Zoom Setup
Overview
KAI Conversations has prepared this information pack to enable you to create a successful call recording on Zoom. The first thing to bear in mind is that nothing will be different to a regular call/meeting. Your video will be recorded and then processed after it has finished. All recordings will be stored and handled in line with our Privacy Policy.
When recording a conversation, it is essential that the recording is in ‘Gallery’ format. This will position the participants left and right of each other. To ensure you are recording in the correct format, please make sure you follow the steps detailed below.

Gallery View example
Zoom has several recording layouts for local and cloud recordings. Some recording layouts are possible with local recordings, some with cloud recordings, and some that are possible for both.
Local Recording Setup
If you are using a local recording, the captured content is based on how the participant who started the recording see’s the meeting. For example, if the participant that starts the recording is in Gallery view, the recording layout will be in Gallery view.
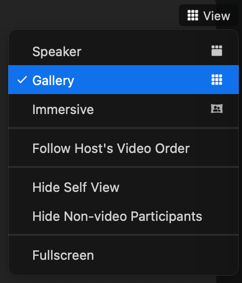
To ensure you are in Gallery view, please follow the below steps:
Once you are in the meeting room, click on ‘View’ in the top right-hand side of the screen and select ‘Gallery’.
Now you are ready to start the recording.
Cloud Recording Setup
If you are using cloud recordings, all layouts will be captured through the Zoom servers, and it will not matter what the participant’s current view is. However, it will be based on the original host’s (i.e., the person who set up the meeting) cloud recording settings.
To enable Gallery view, please follow to below steps:
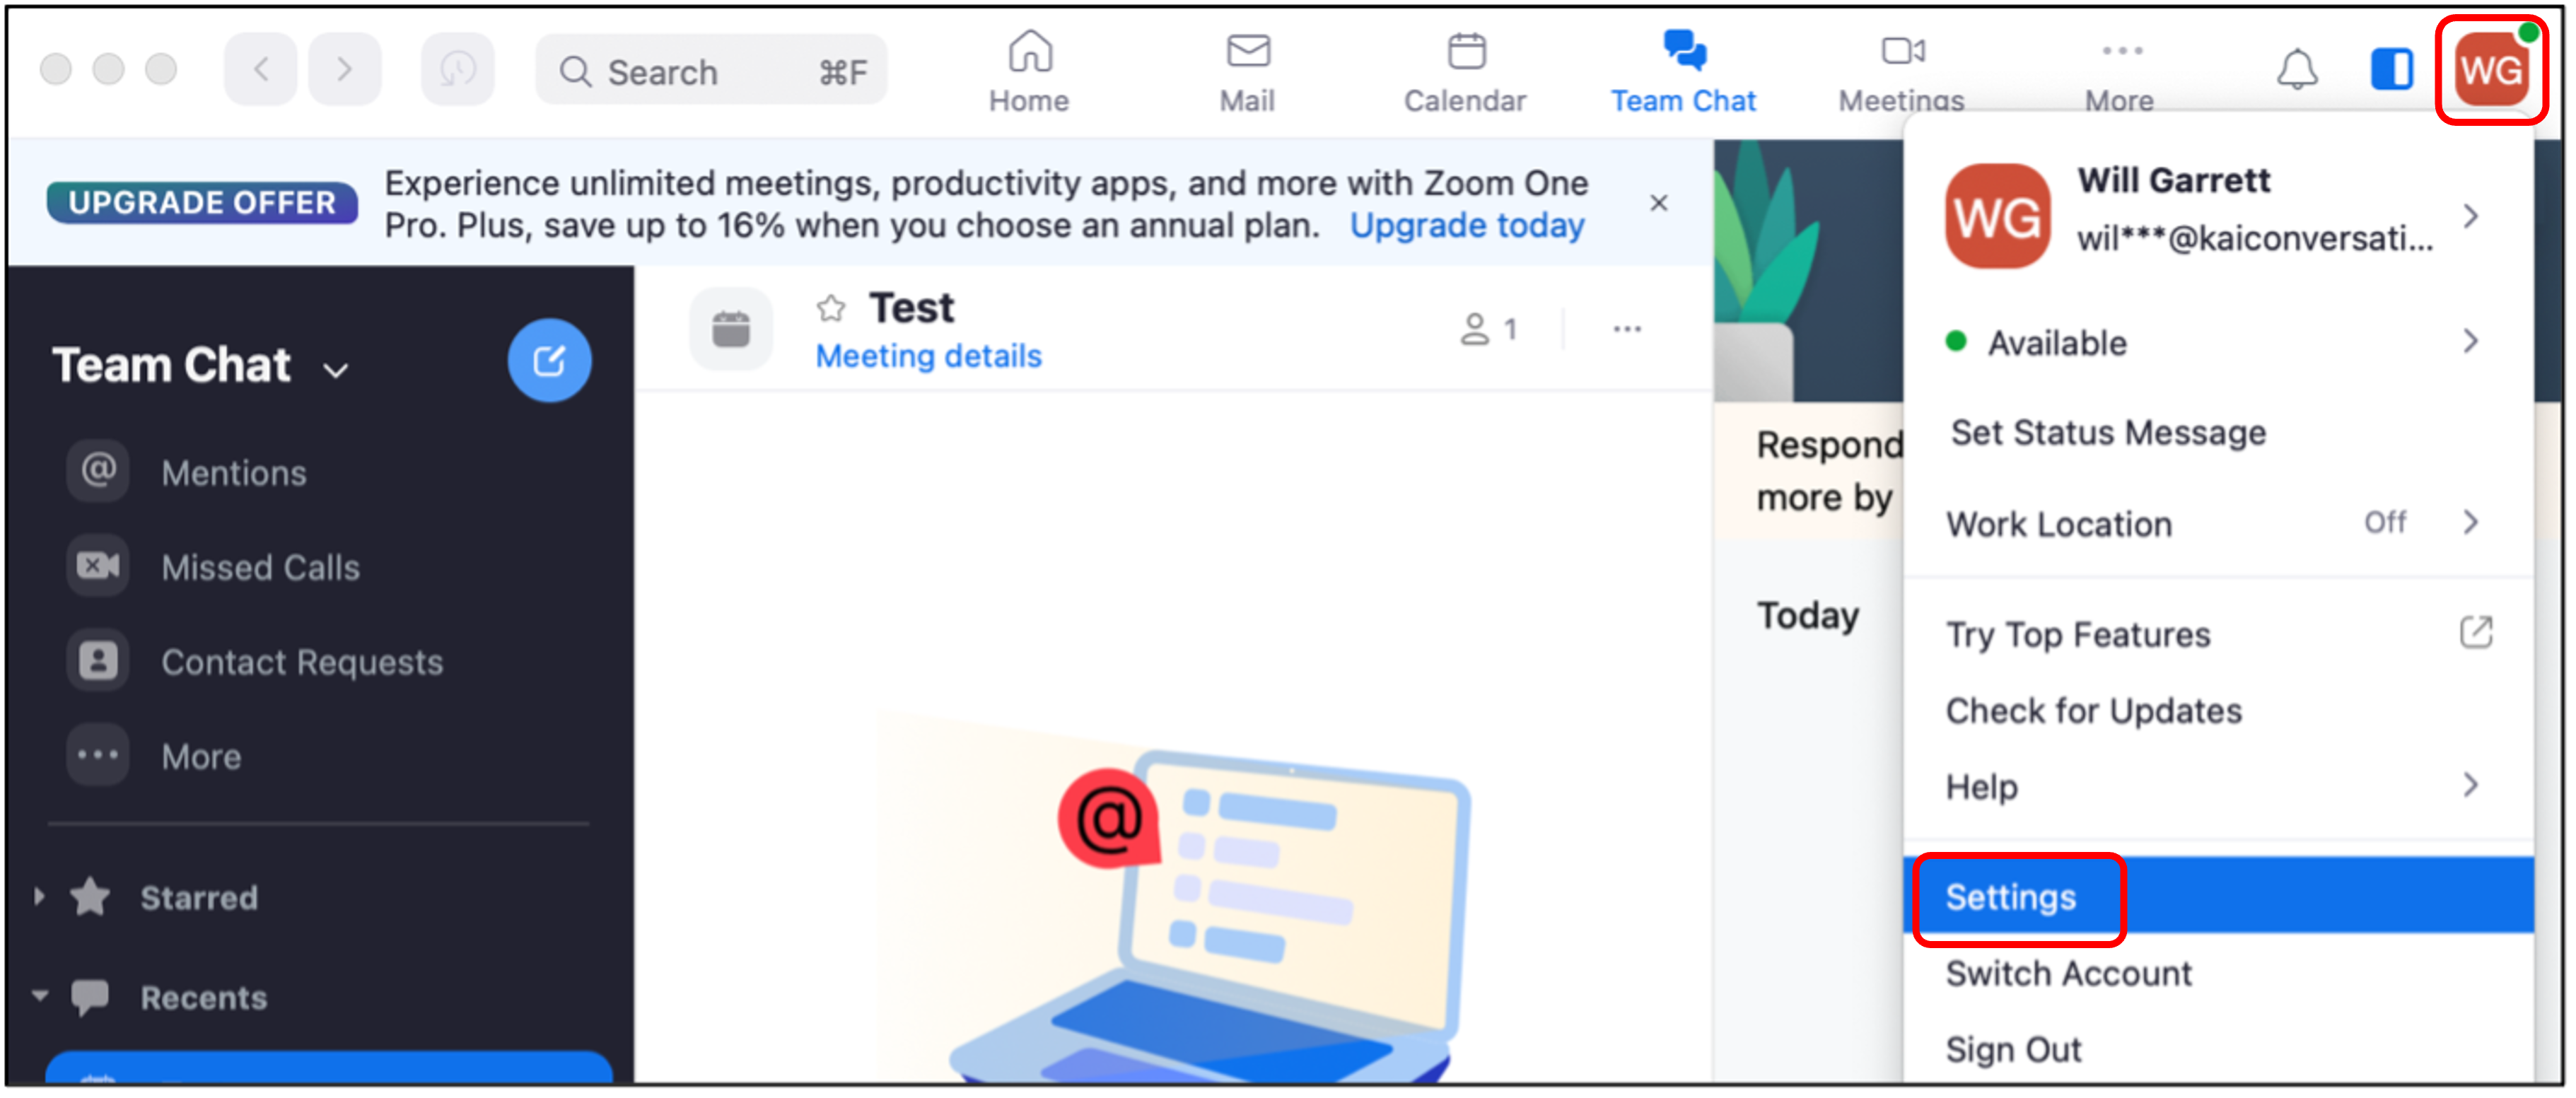
On the main dashboard, click on your profile in the top right-hand corner of the window and click ‘Settings’.
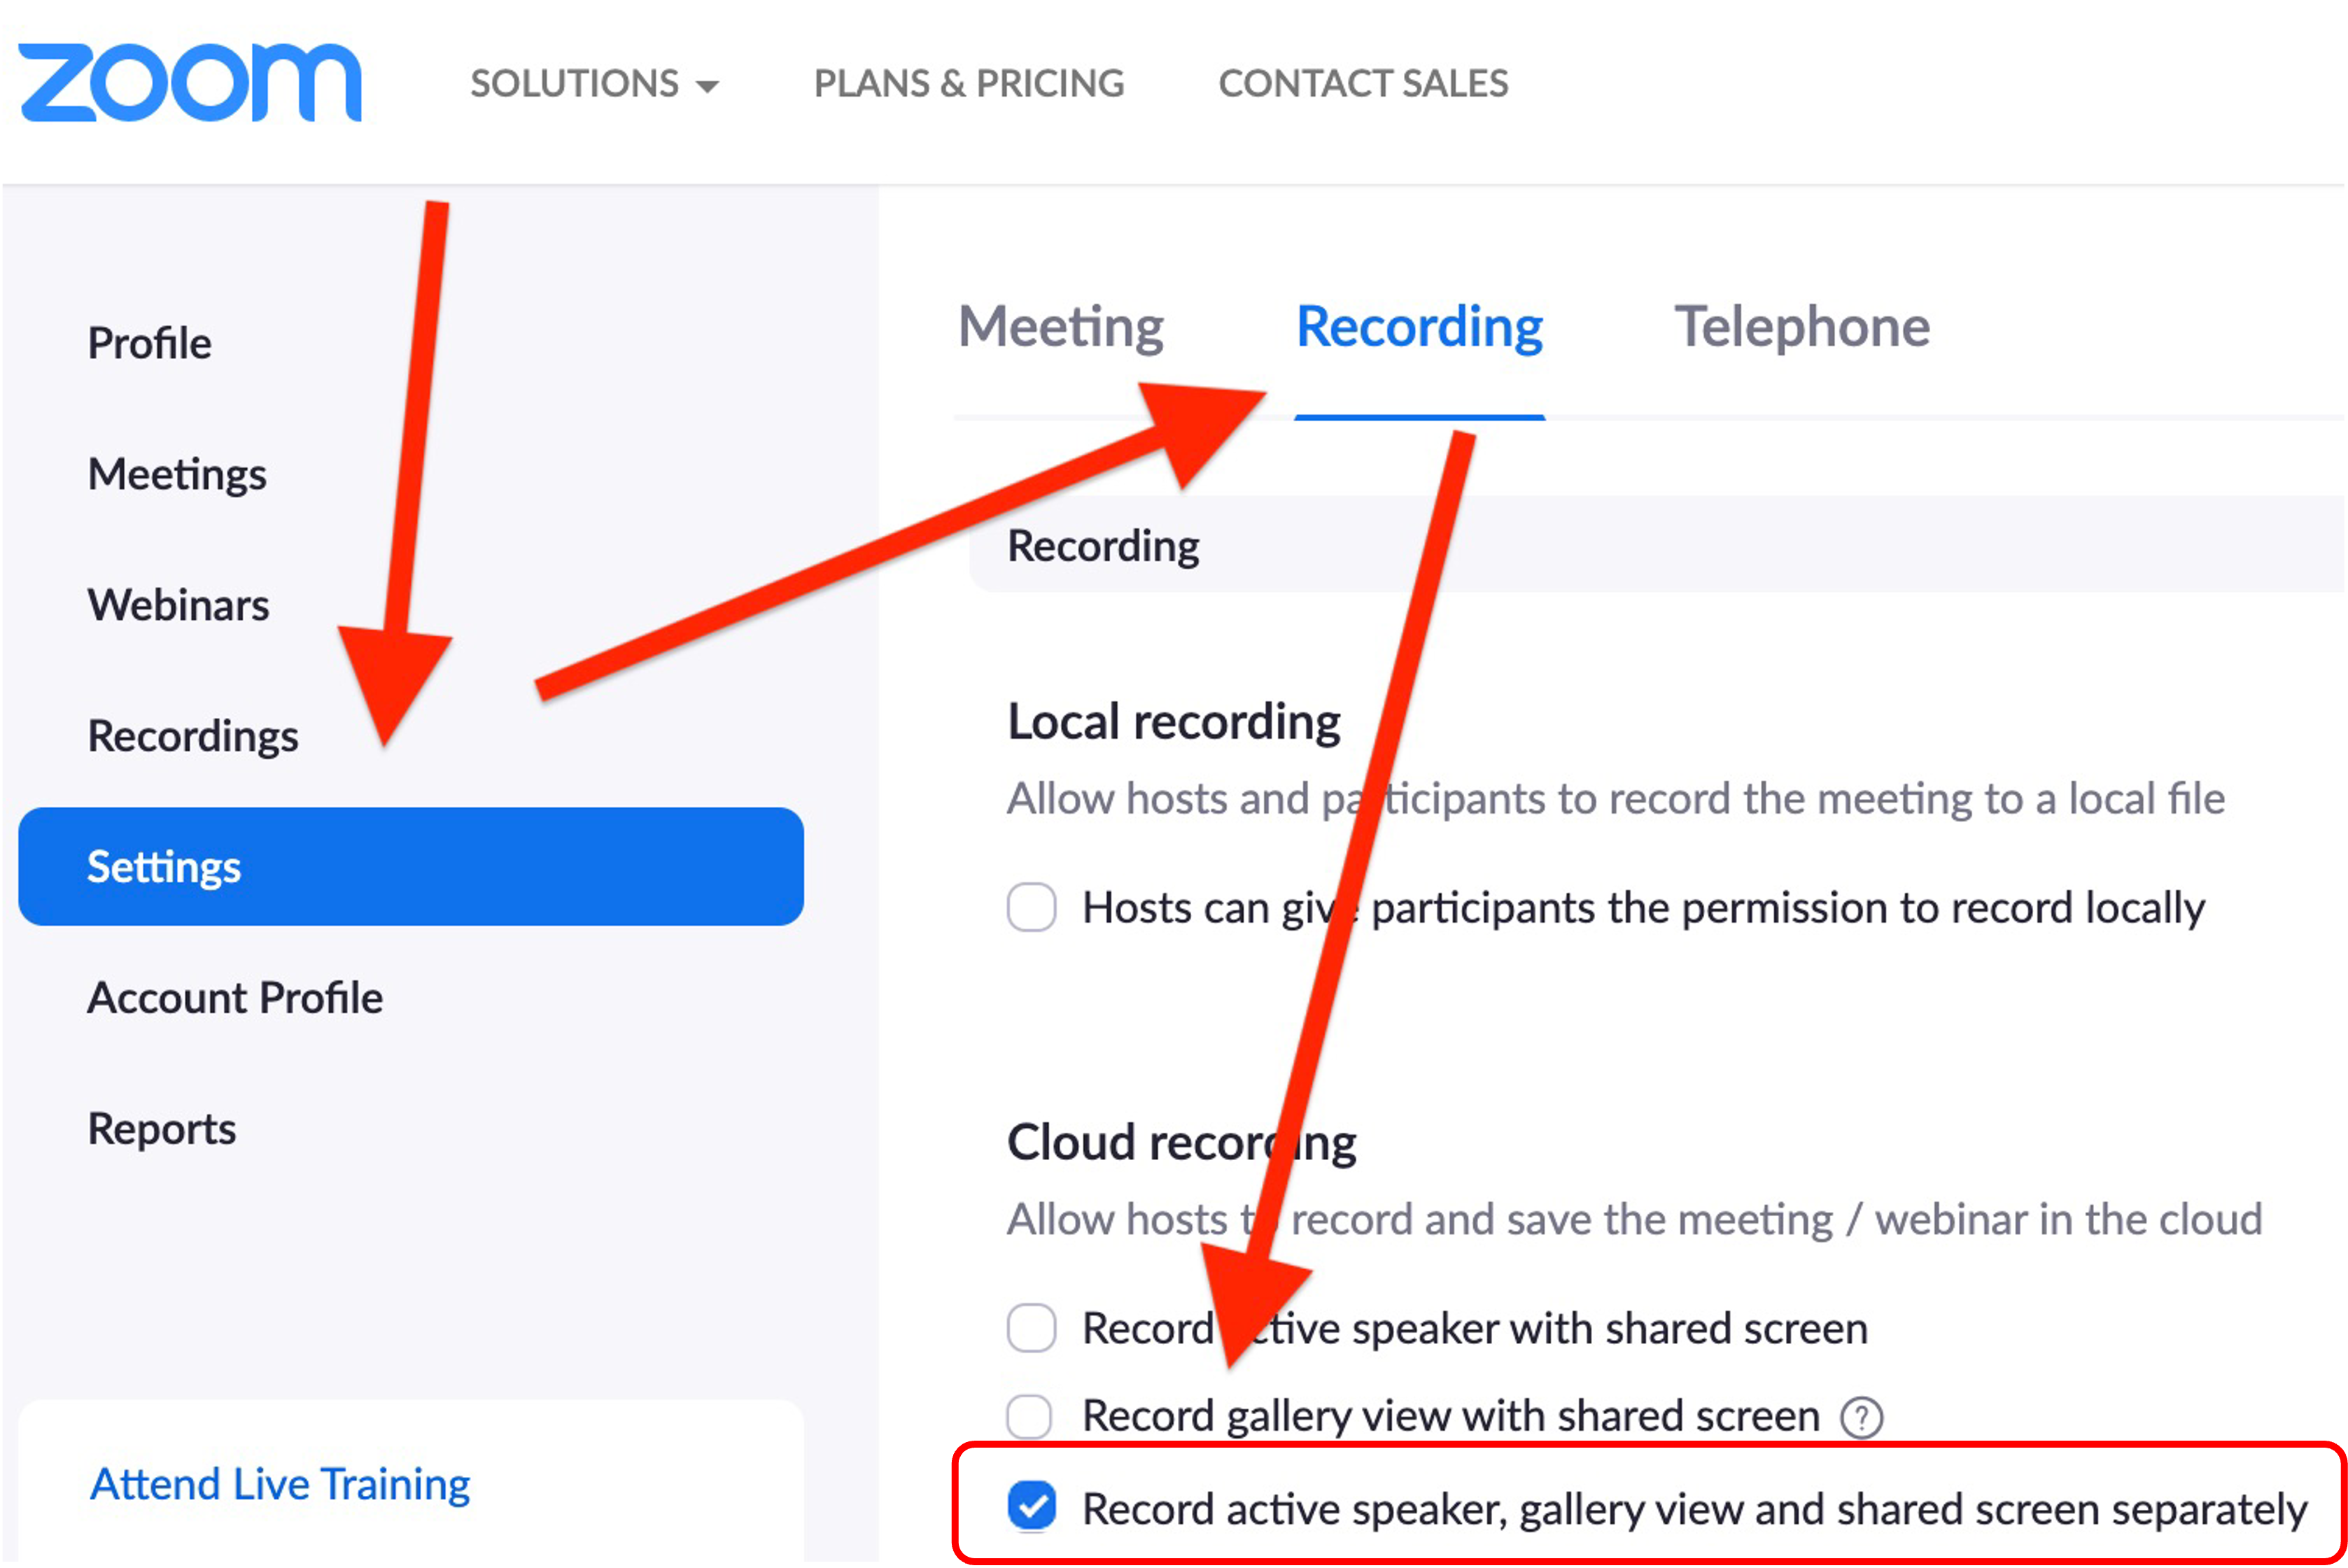
Click Recording and then enable ‘Record gallery view with shared screen’ and ‘Record active speaker, gallery view and shared screen separately’.
Starting your Recording
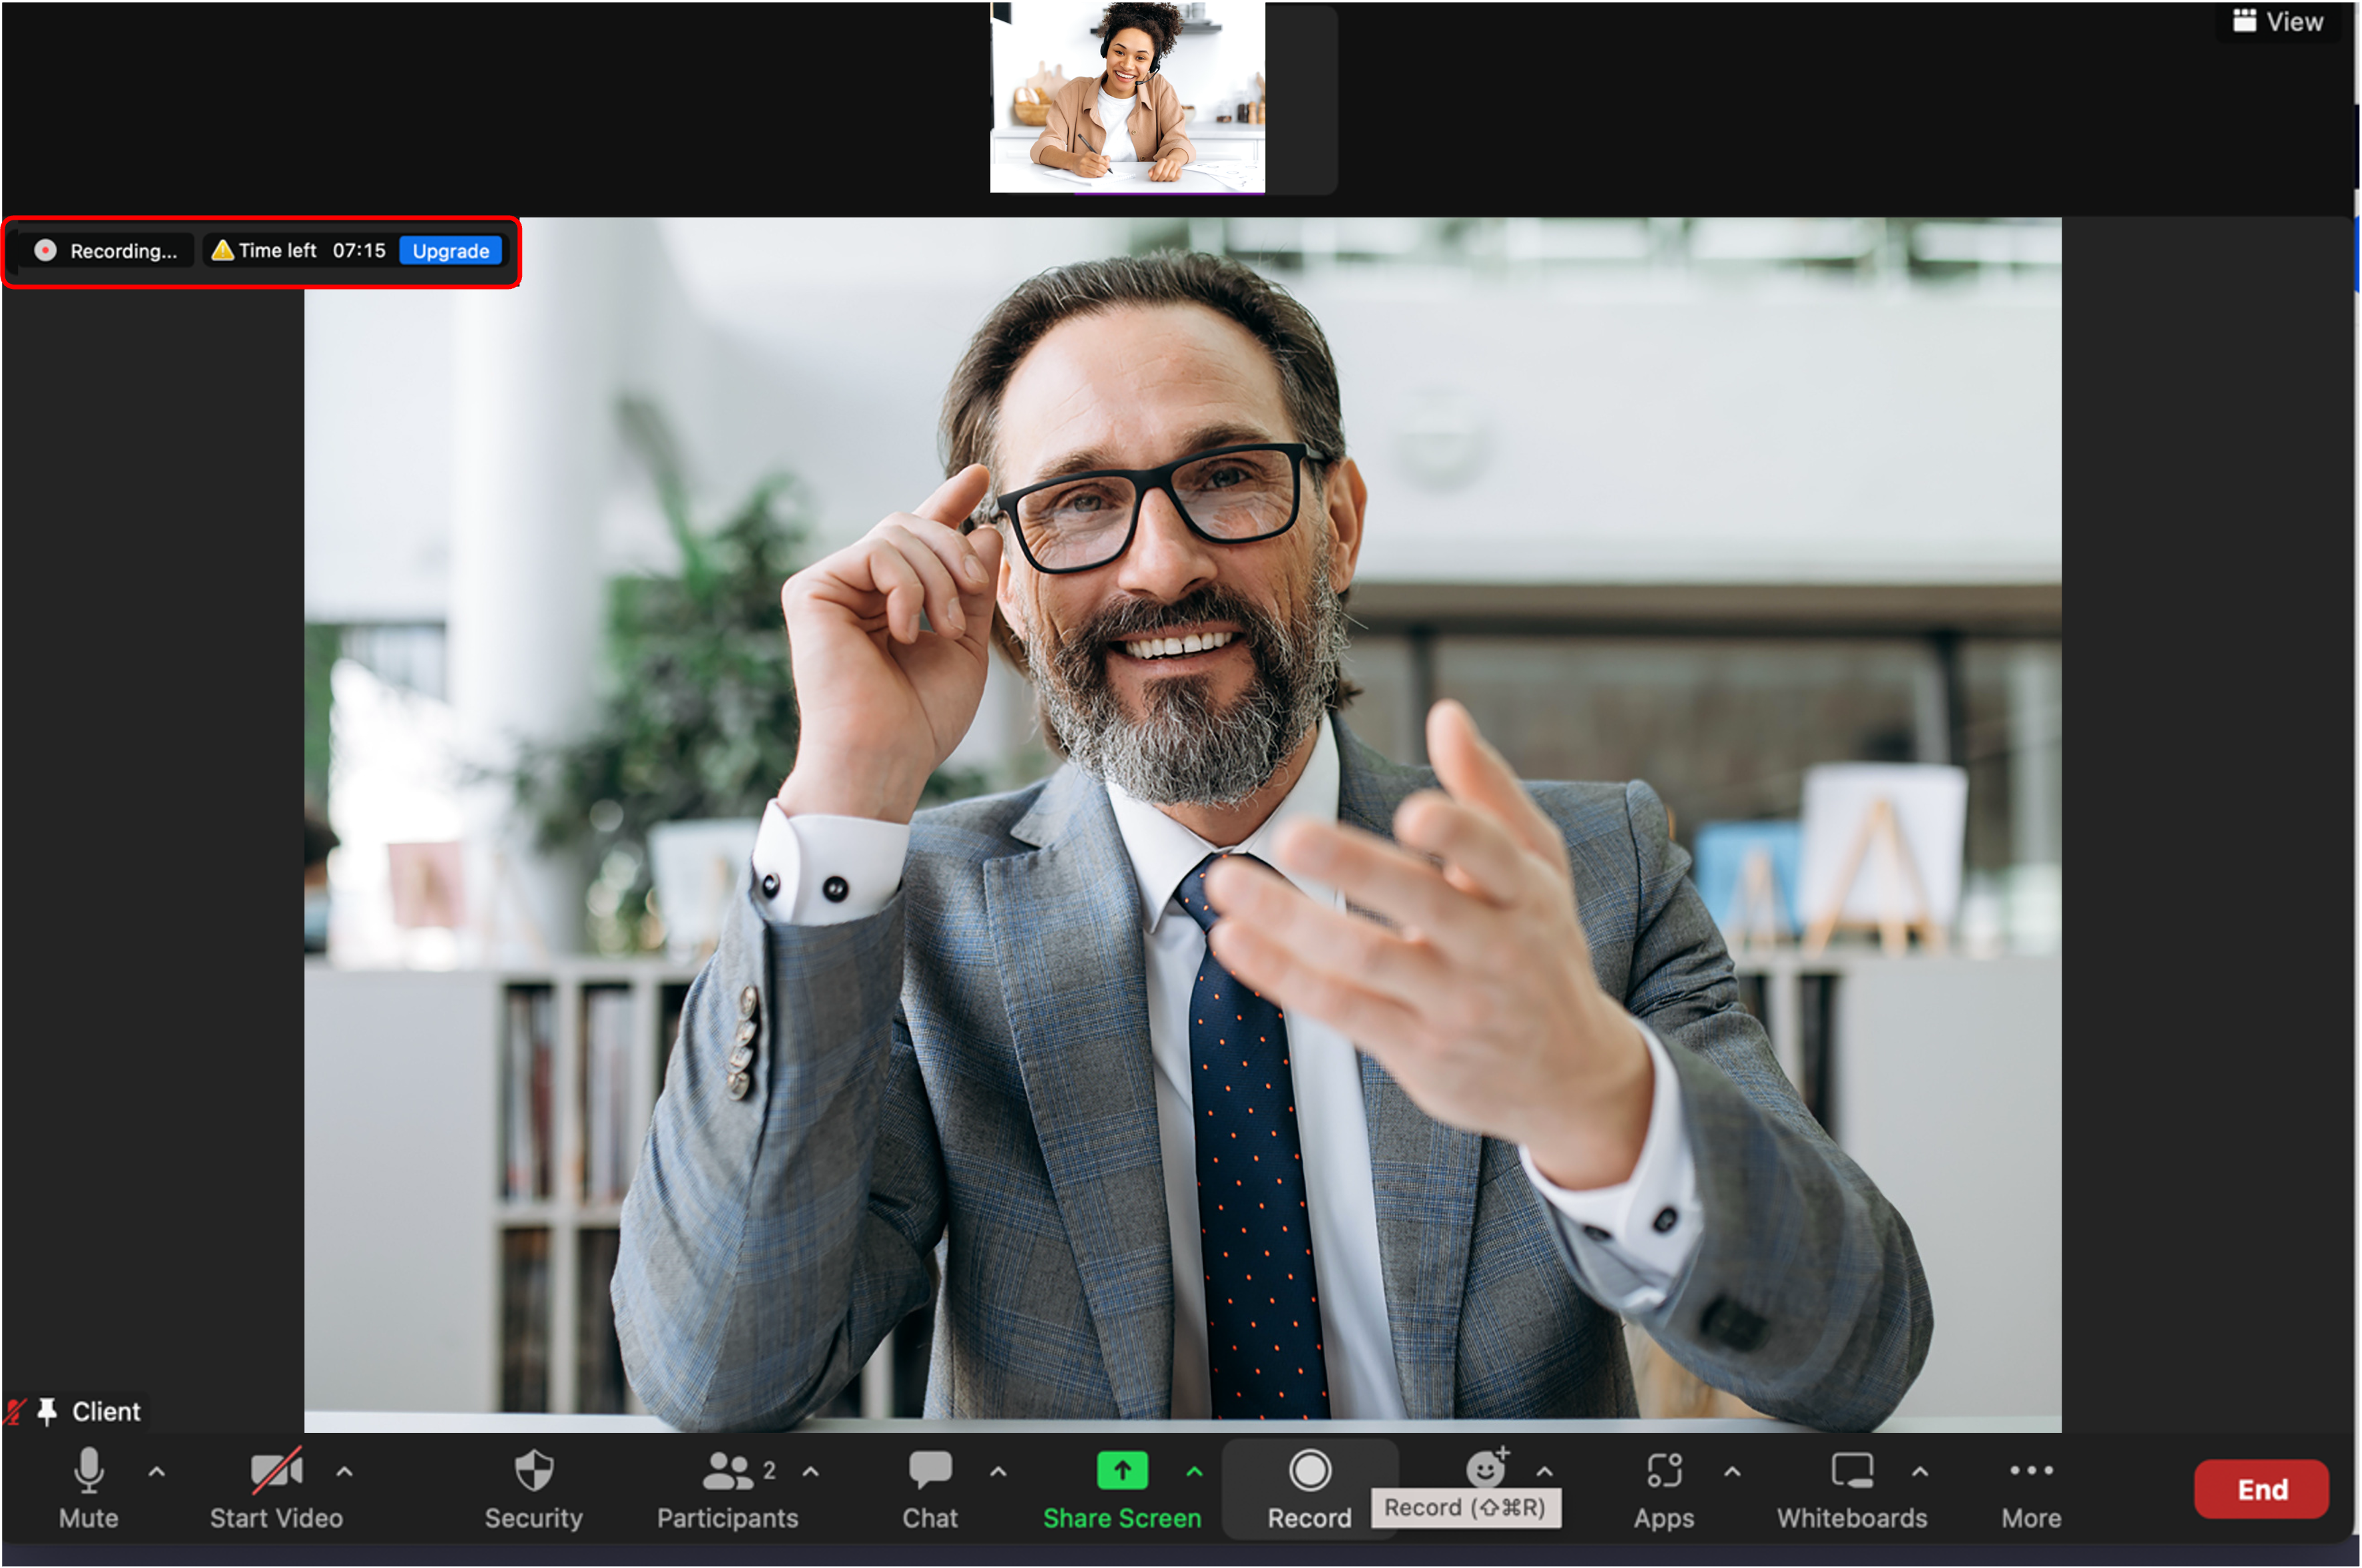
Once all participants are in the meeting room, click ‘Record’.
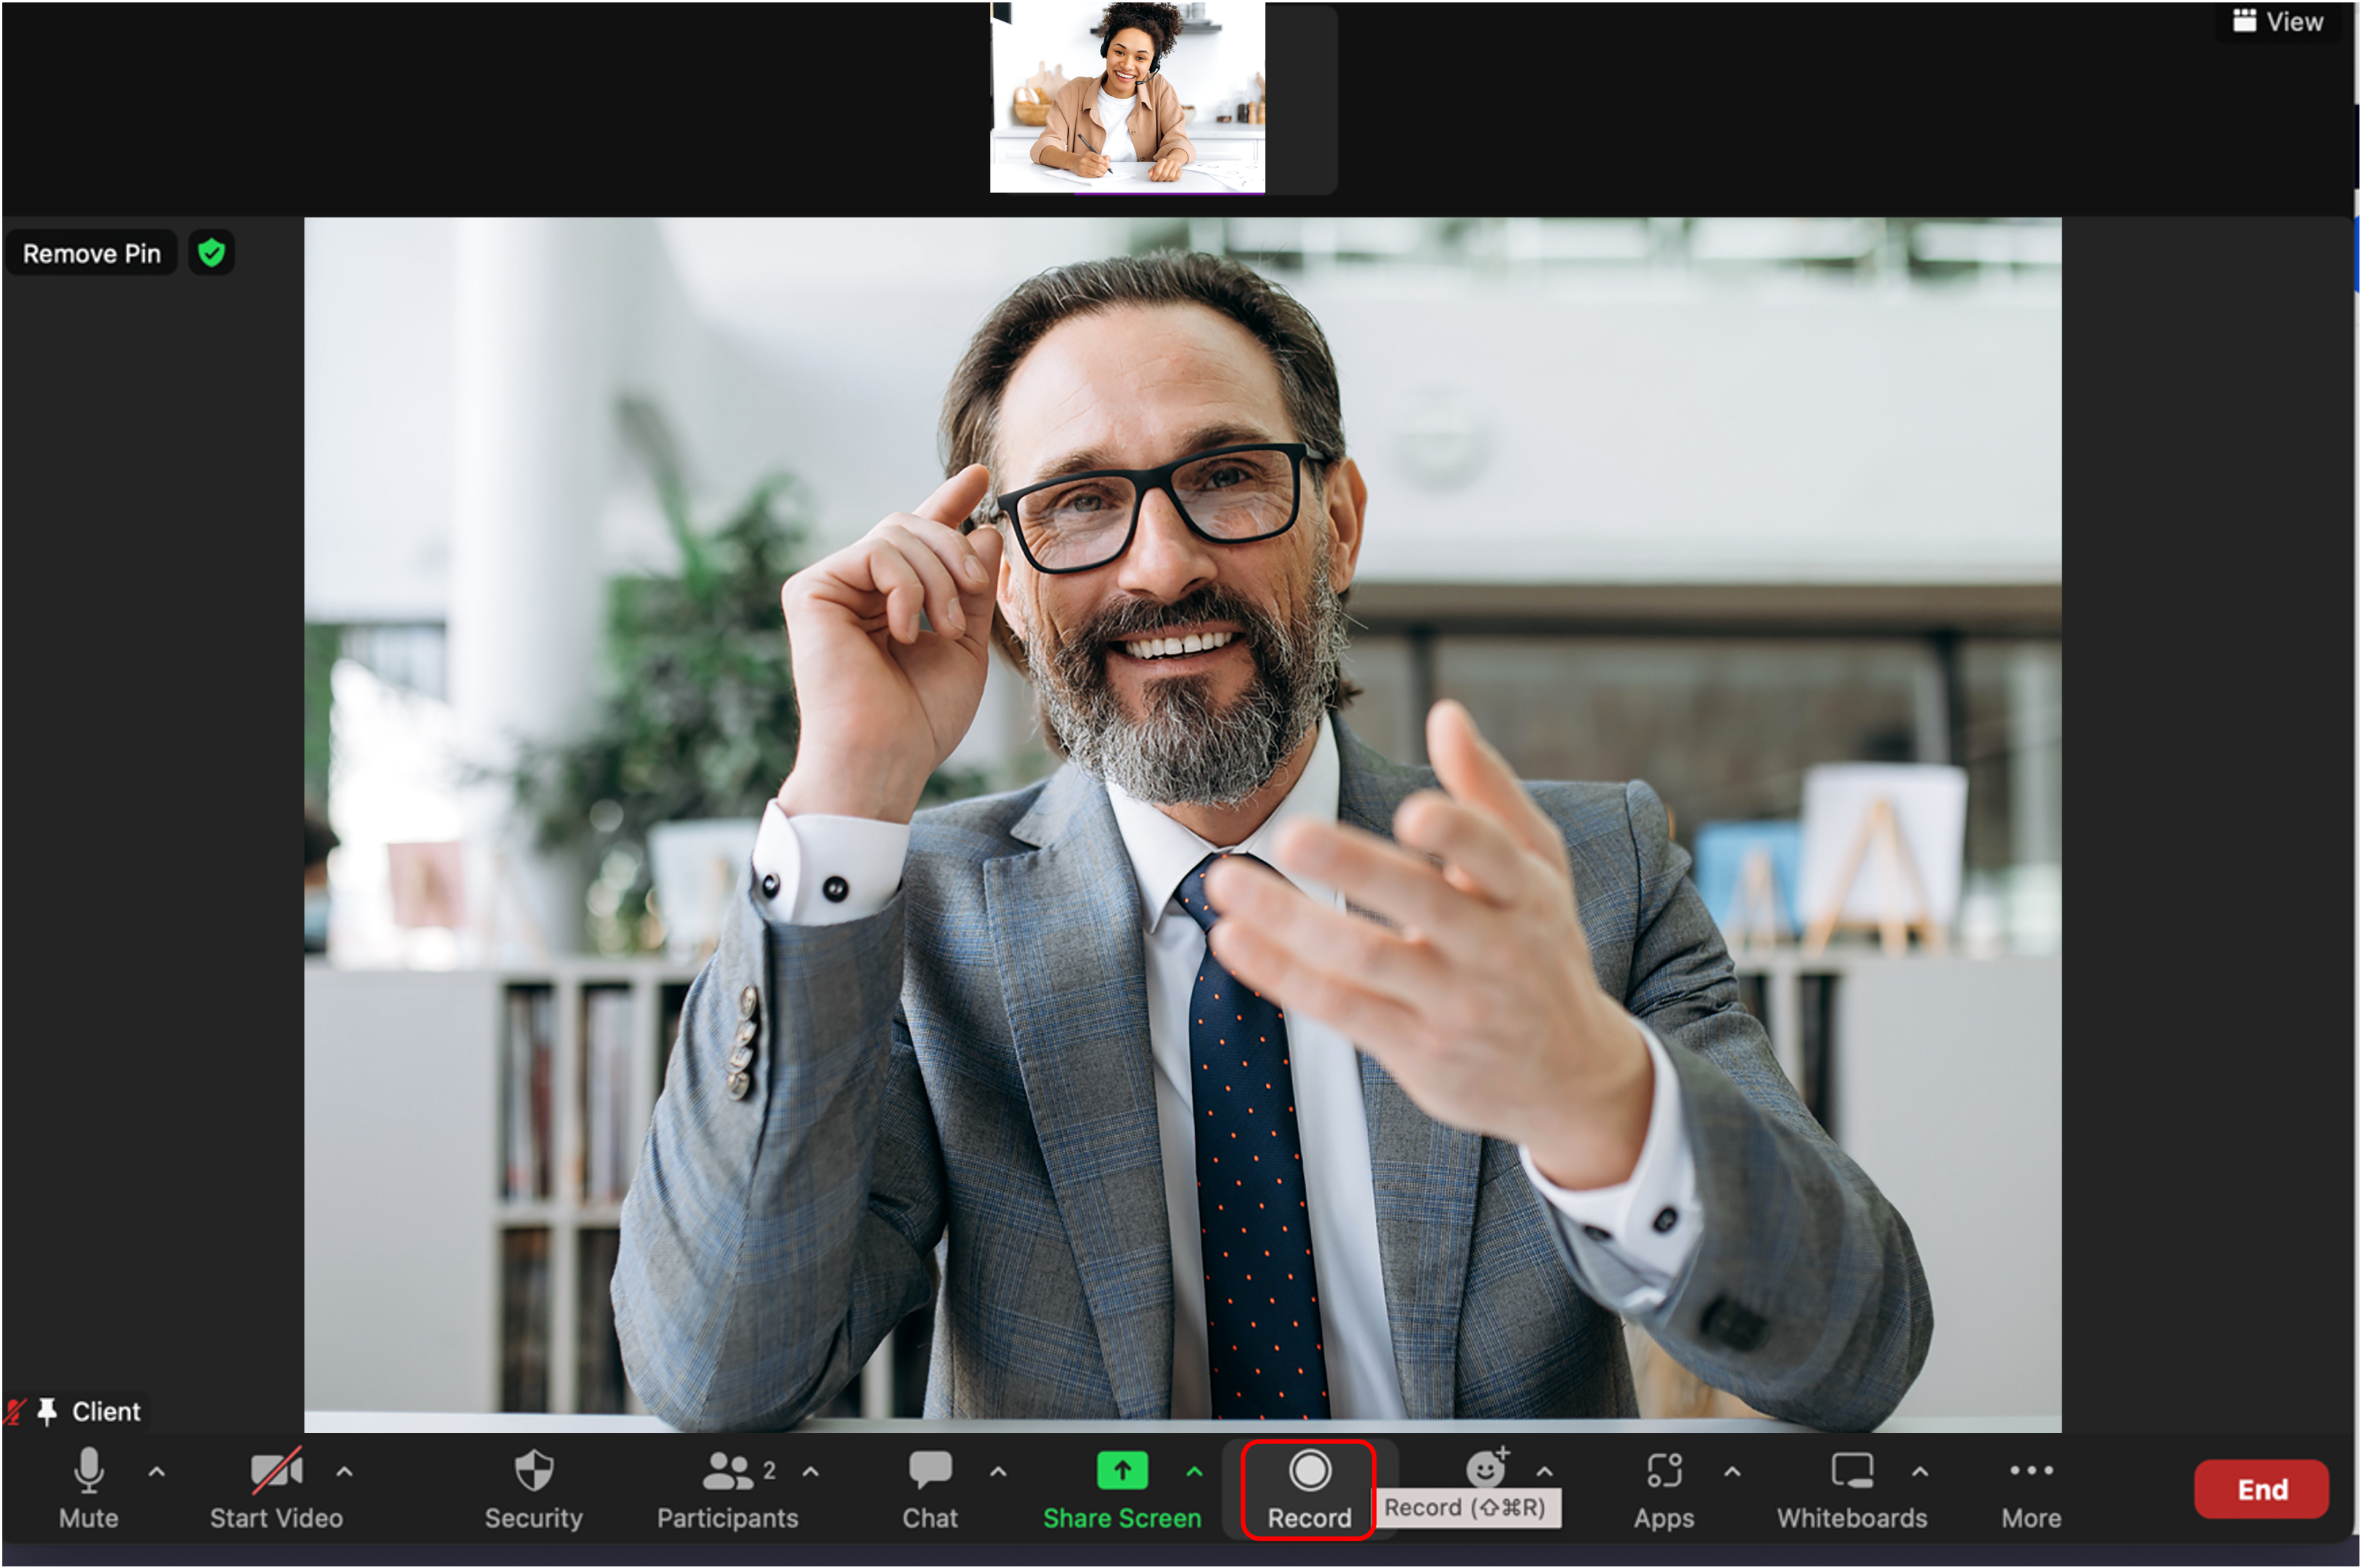
Confirm that it is recording by ensuring you see a red circle in the top left of the screen.
Ending your Recording
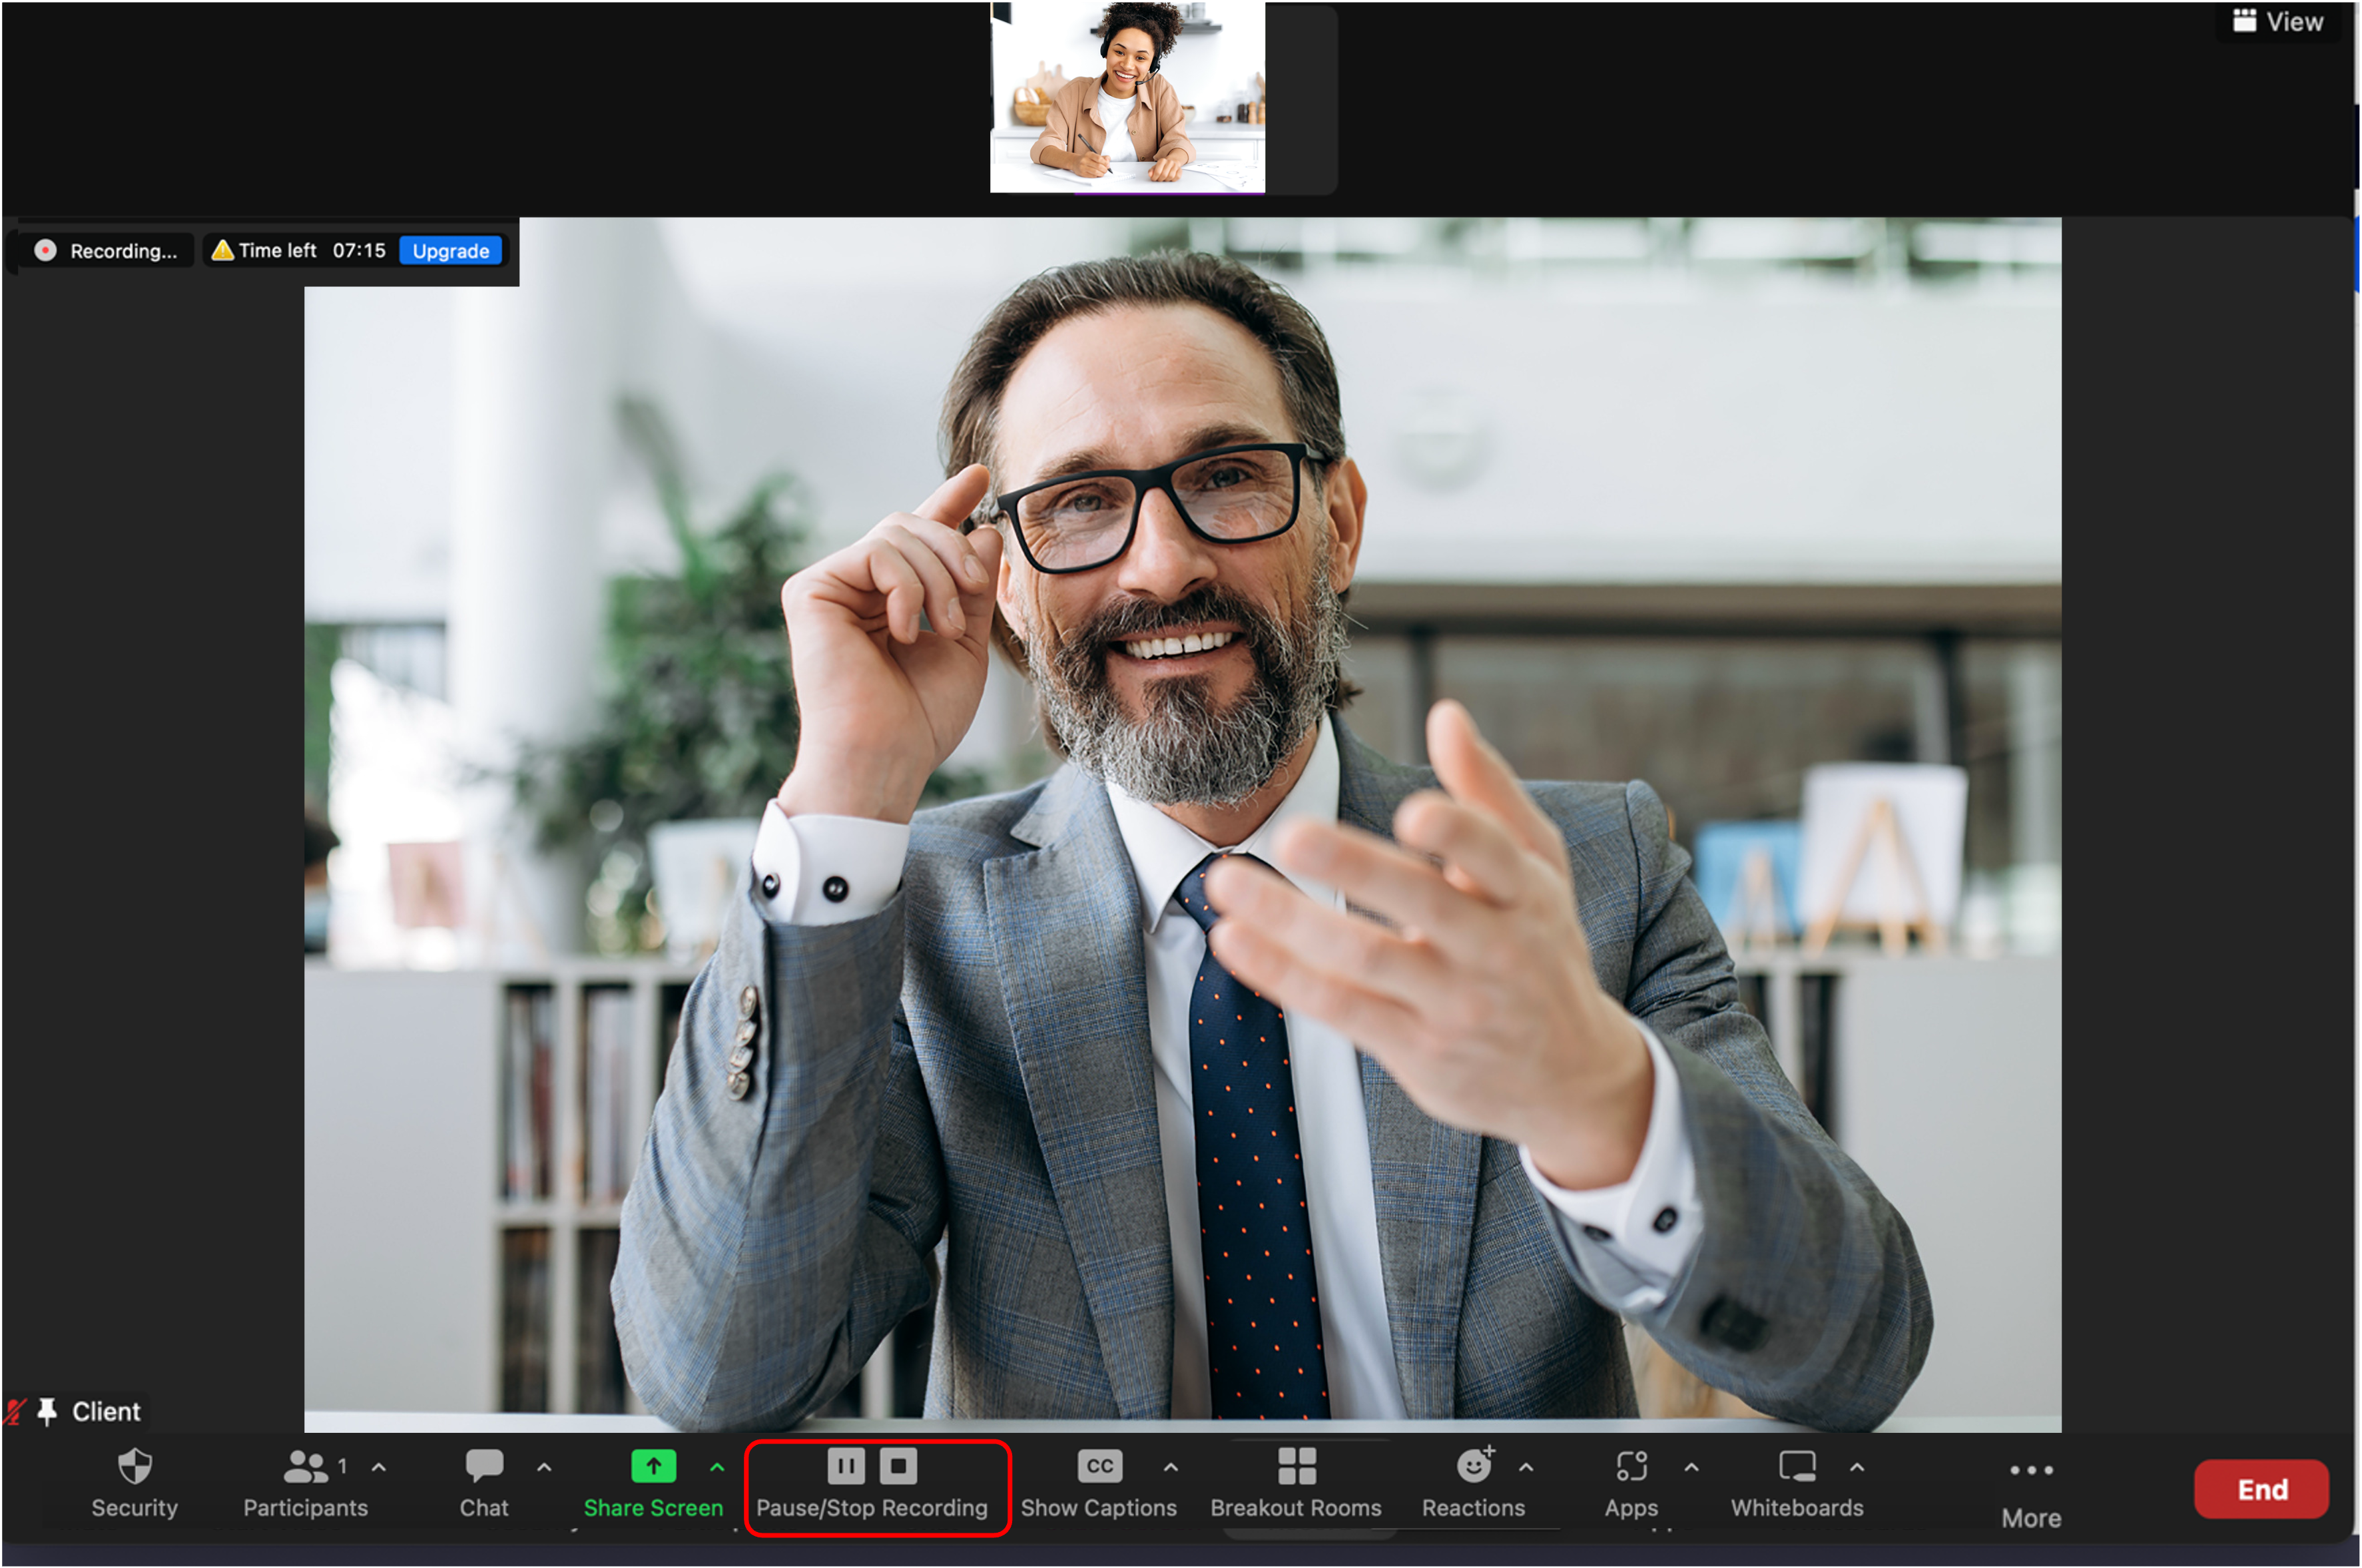
To end the Recording, click on the stop button as seen below.
Collecting your Recording
Retrieving your recording will depend on whether you are using a local or cloud recording.
Local Recording
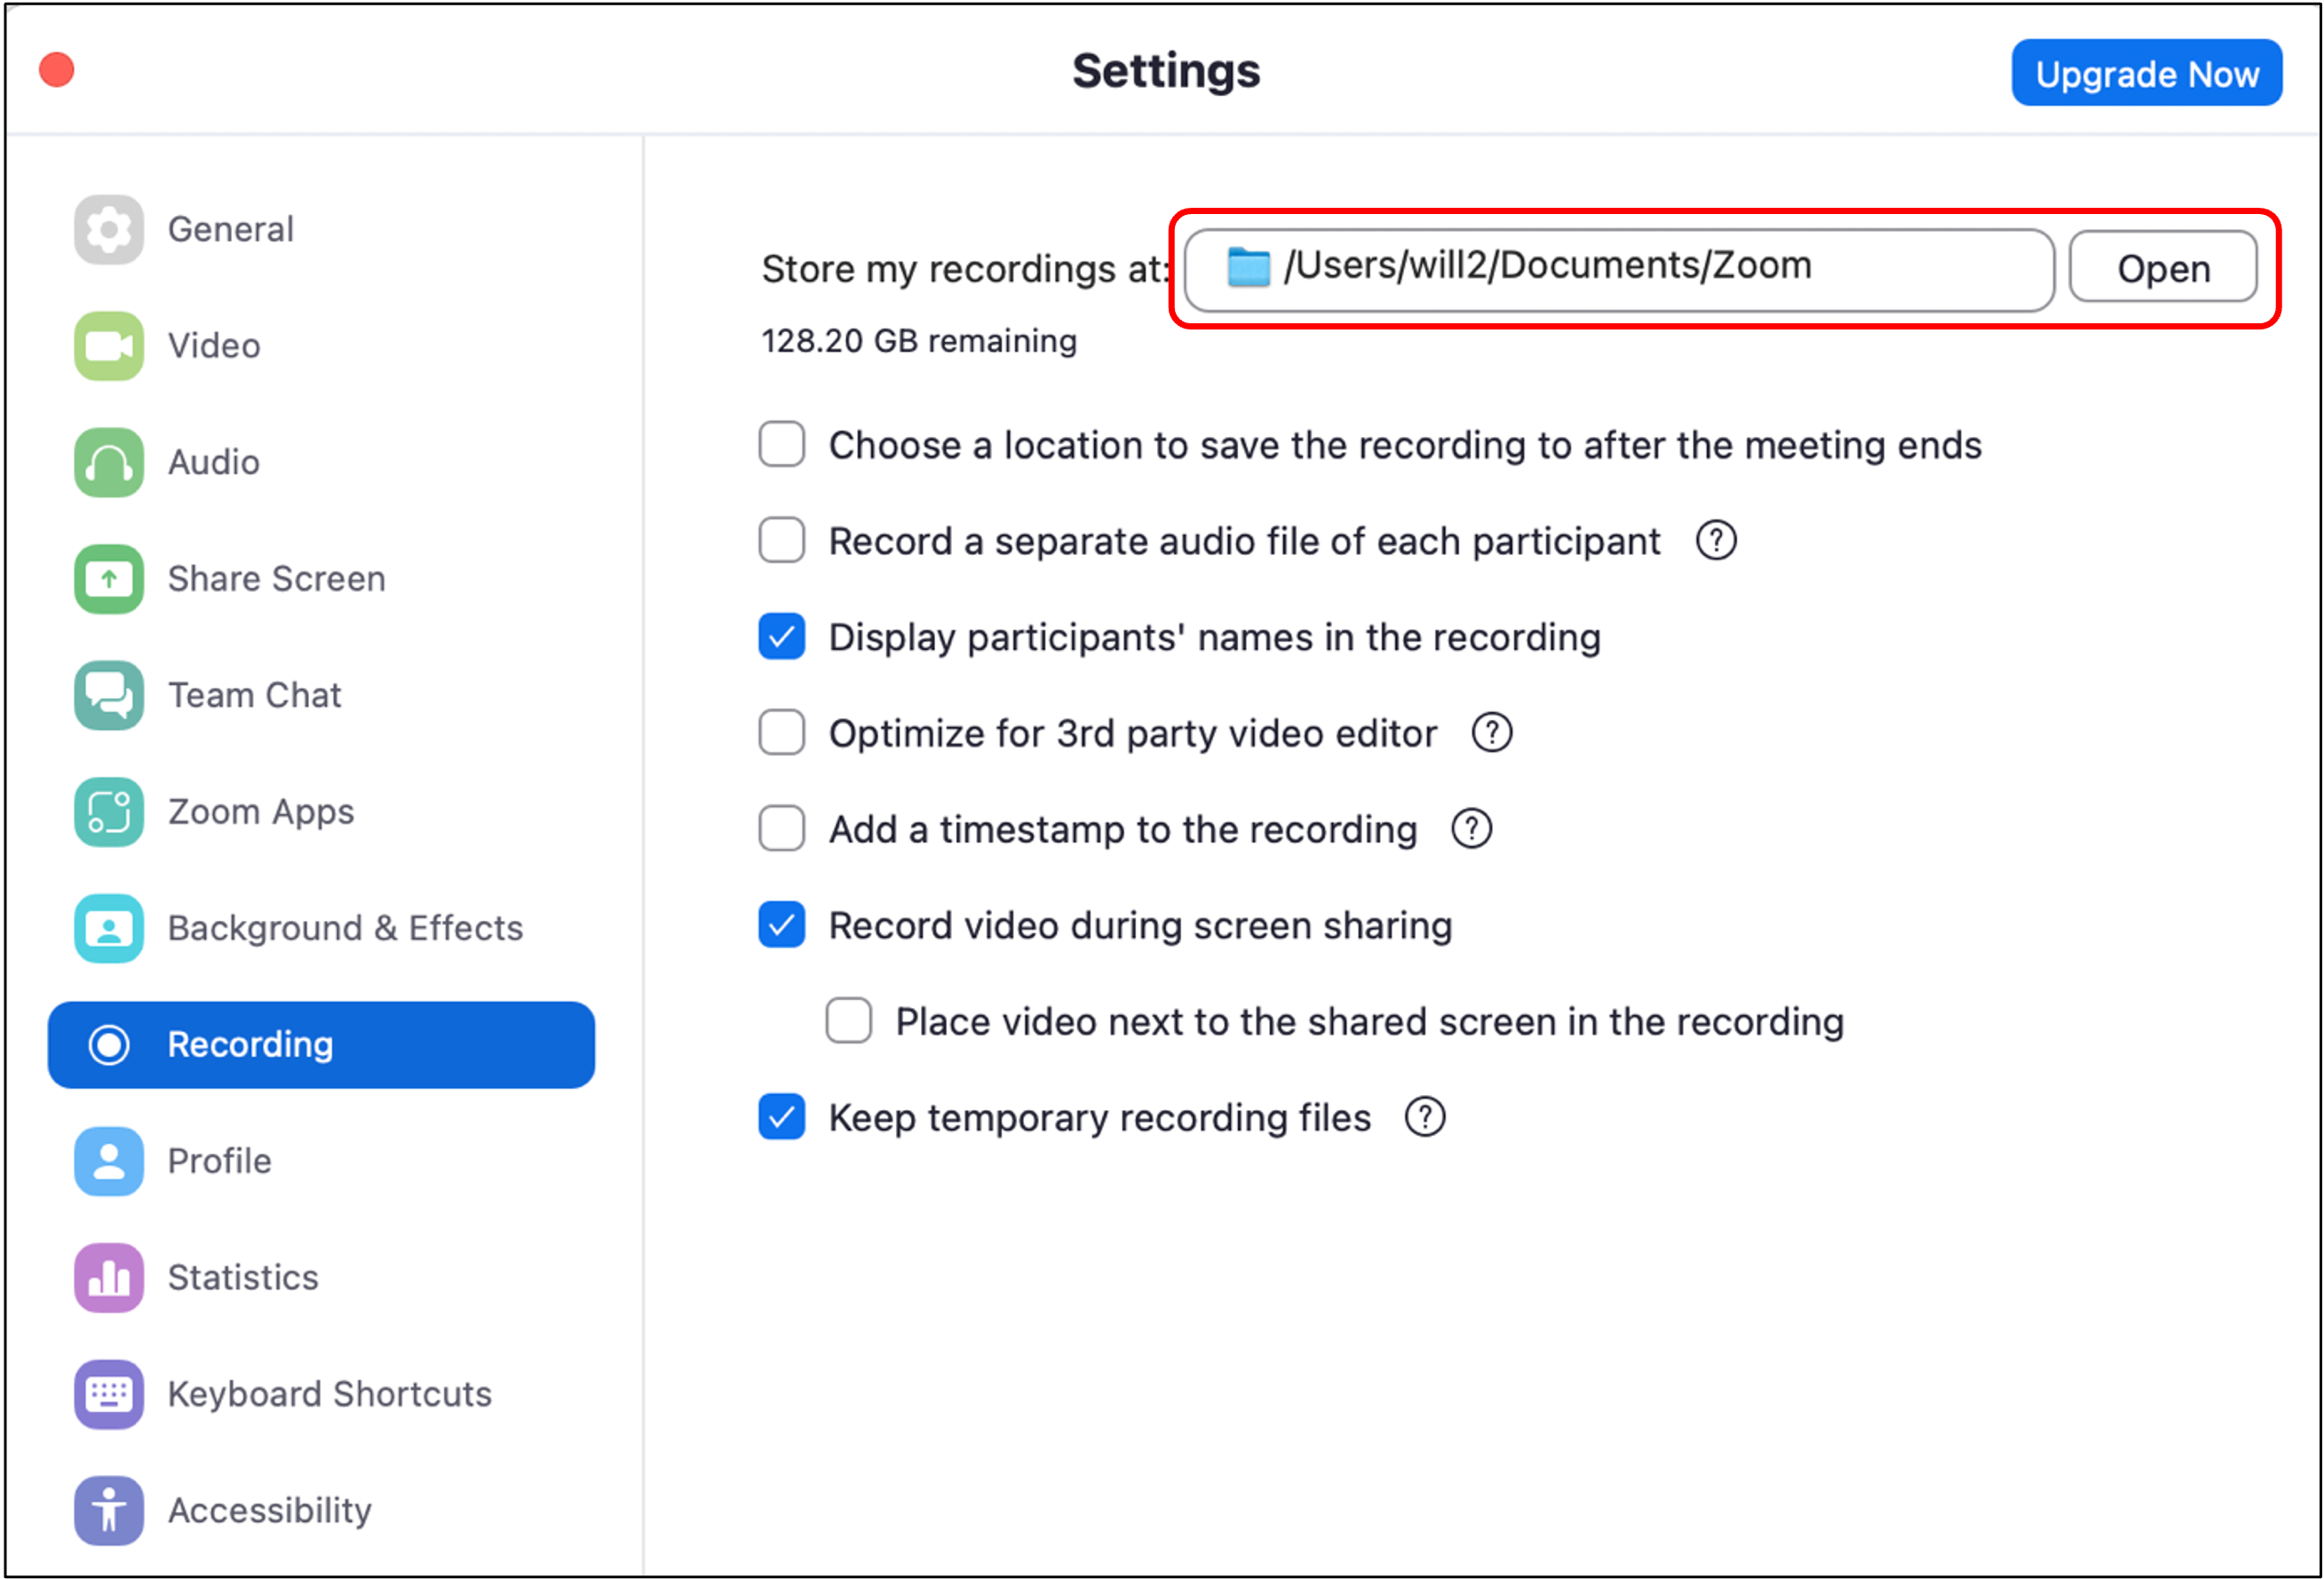
The recording will automatically be saved to your personal files. To view this, navigate to ‘Settings’ and click ‘Recording’. You can then see where your recording is saved.
Cloud Recording
There are two methods of retrieving your recording when using the Cloud recording method.
After ending and leaving your meeting, you will receive an email notification with a link that takes you to a Zoom web page. Ensure you download the ‘Gallery View’ recording.
You can also access the recording through your account by following the below steps:
Navigate to ‘Settings’ and then select ‘Recording’.
Click on ‘Manage my cloud recording’. This should open your default web browser with all your Zoom recordings.
Select the relevant recording by clicking on its name.
From here you will see several options to download your recording. Select ‘Gallery view’ and click the download icon
From here you will see several options to download your recording. Select ‘Gallery view’ and click the download icon - ![]()
