Microsoft Teams Setup
Overview
KAI Conversations has prepared this information pack to enable you to create a successful call recording on Microsoft Teams. The first thing to bear in mind is that nothing will be different to a regular call/meeting. Your video will be recorded and then processed after it has finished. All recordings will be stored and handled in line with our Privacy Policy.
When recording a conversation, it is essential that the recording is in ‘Gallery’ format. This will position the participants left and right of each other. To ensure you are recording in the correct format, please make sure you follow the steps detailed below.

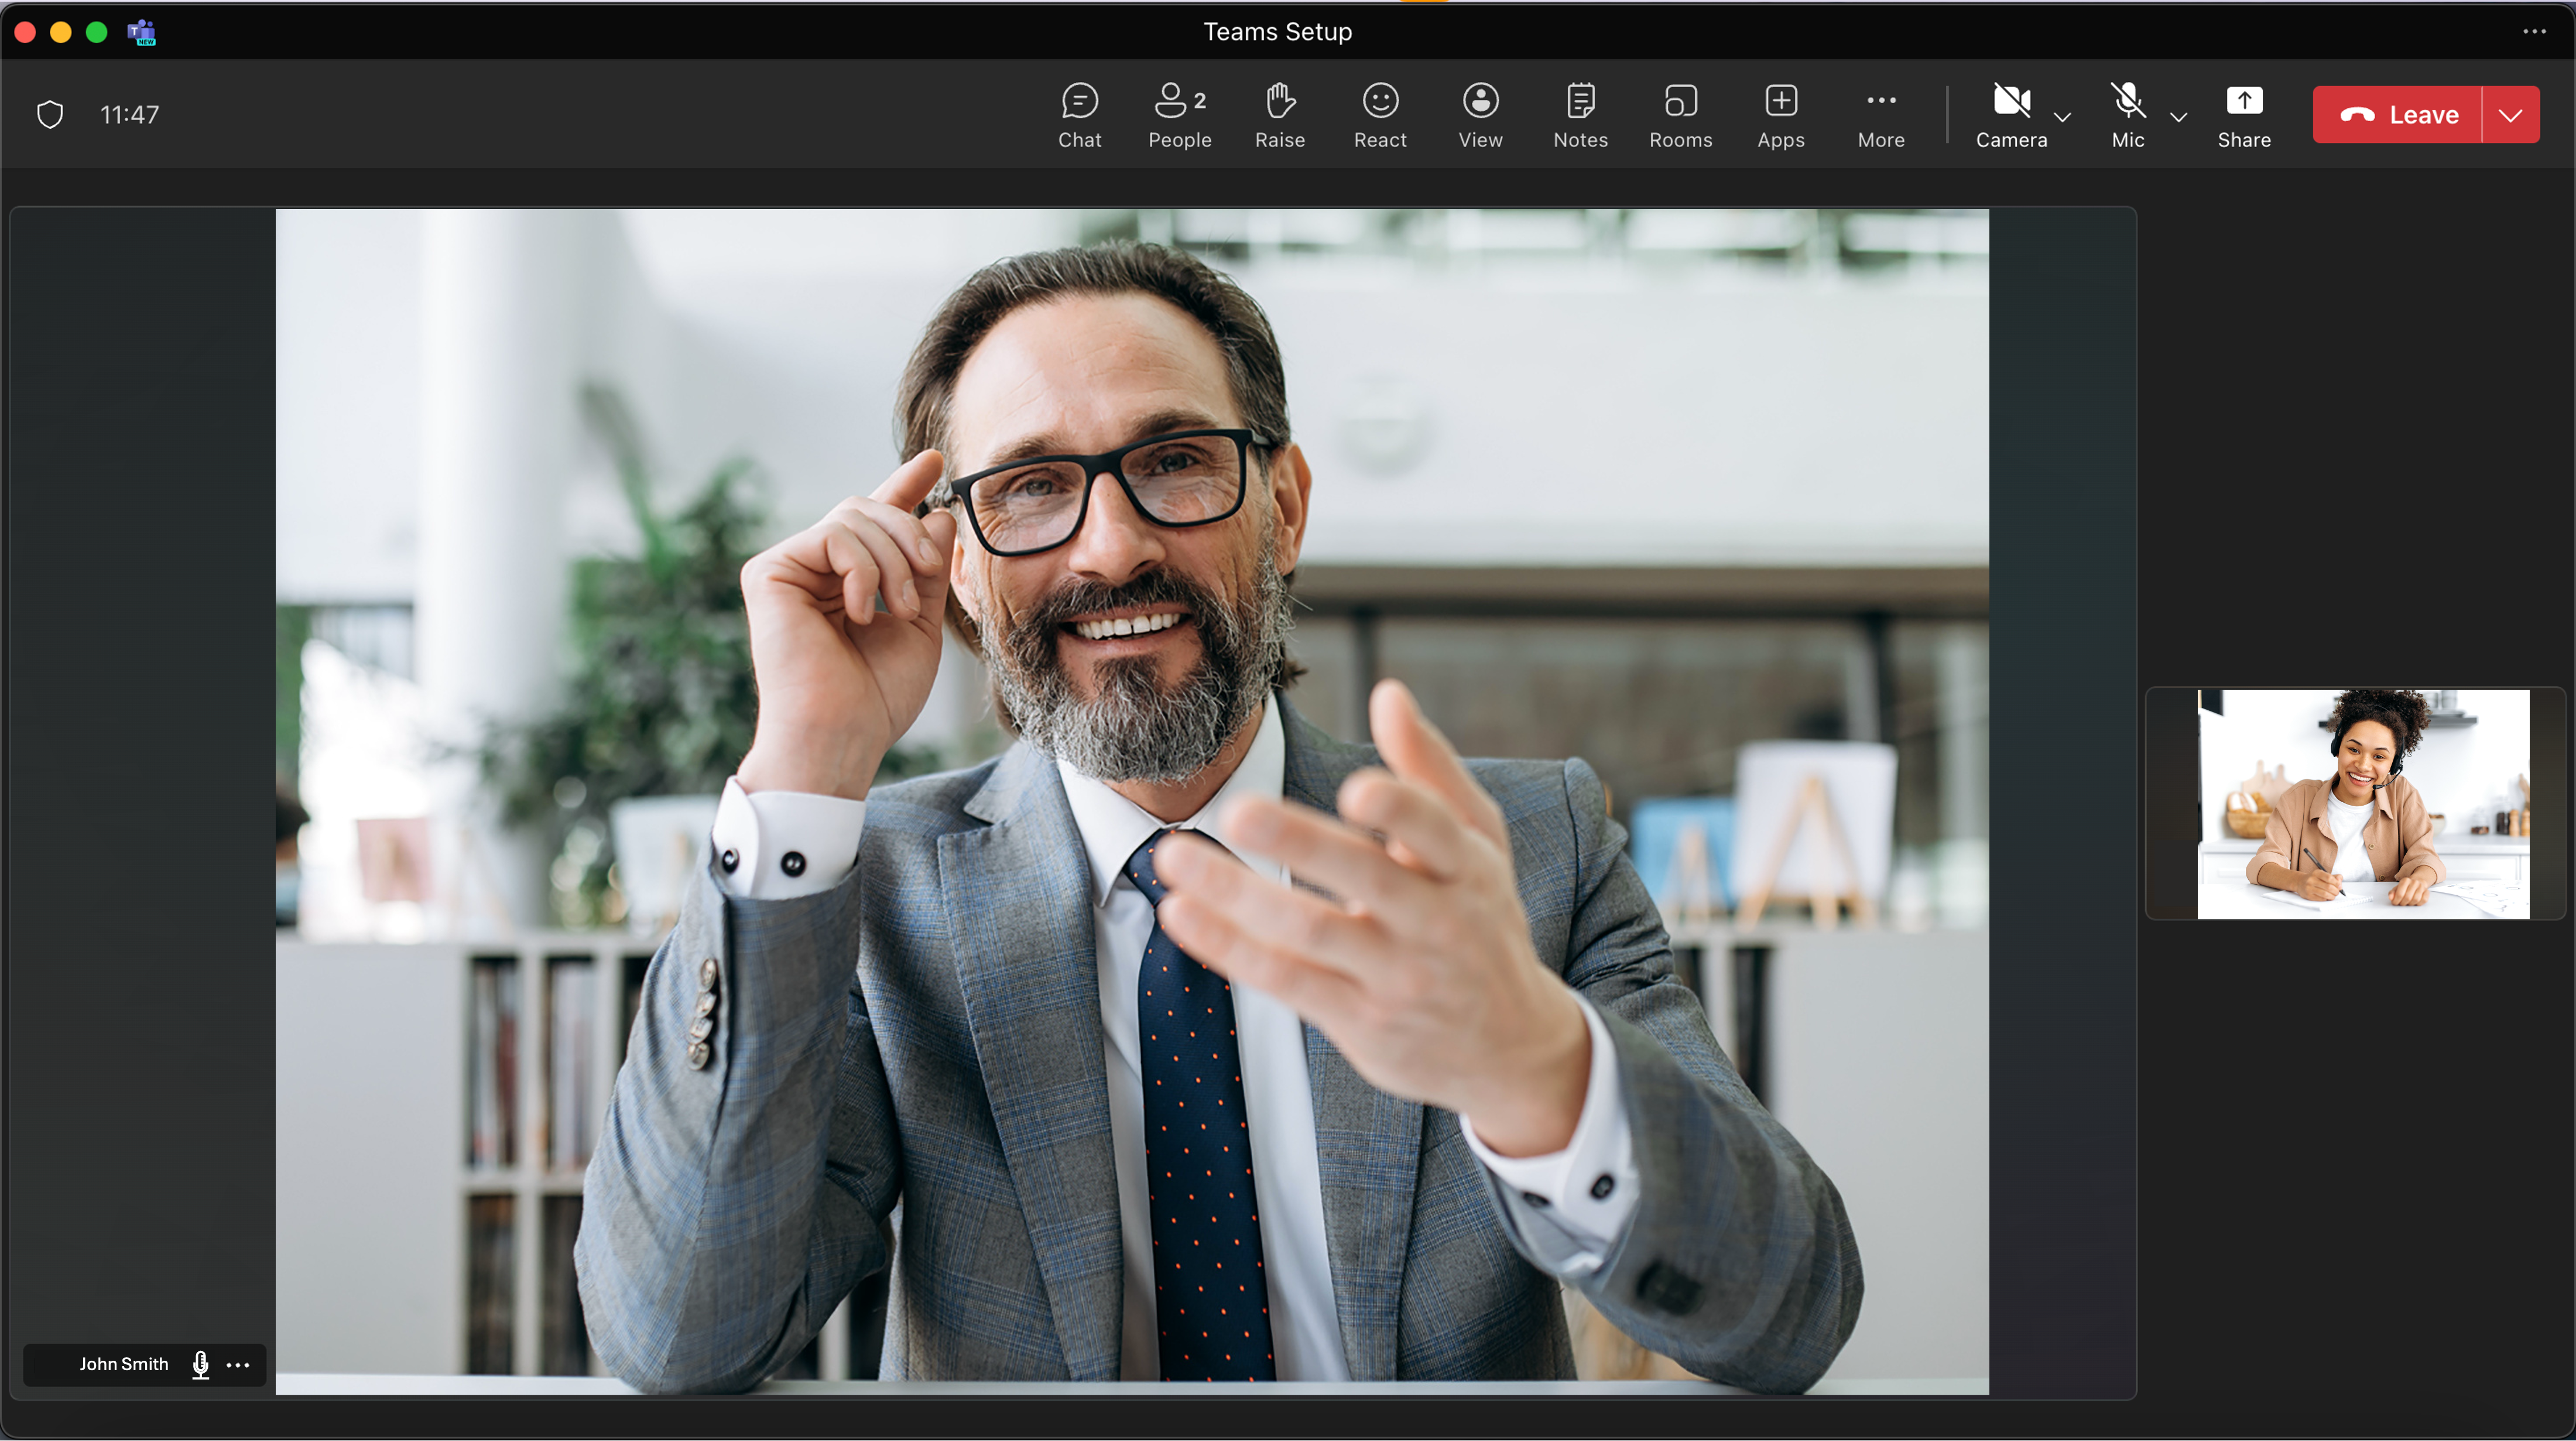
Gallery View example
How to enable ‘Gallery View’
Join the meeting room and ensure all participants are present
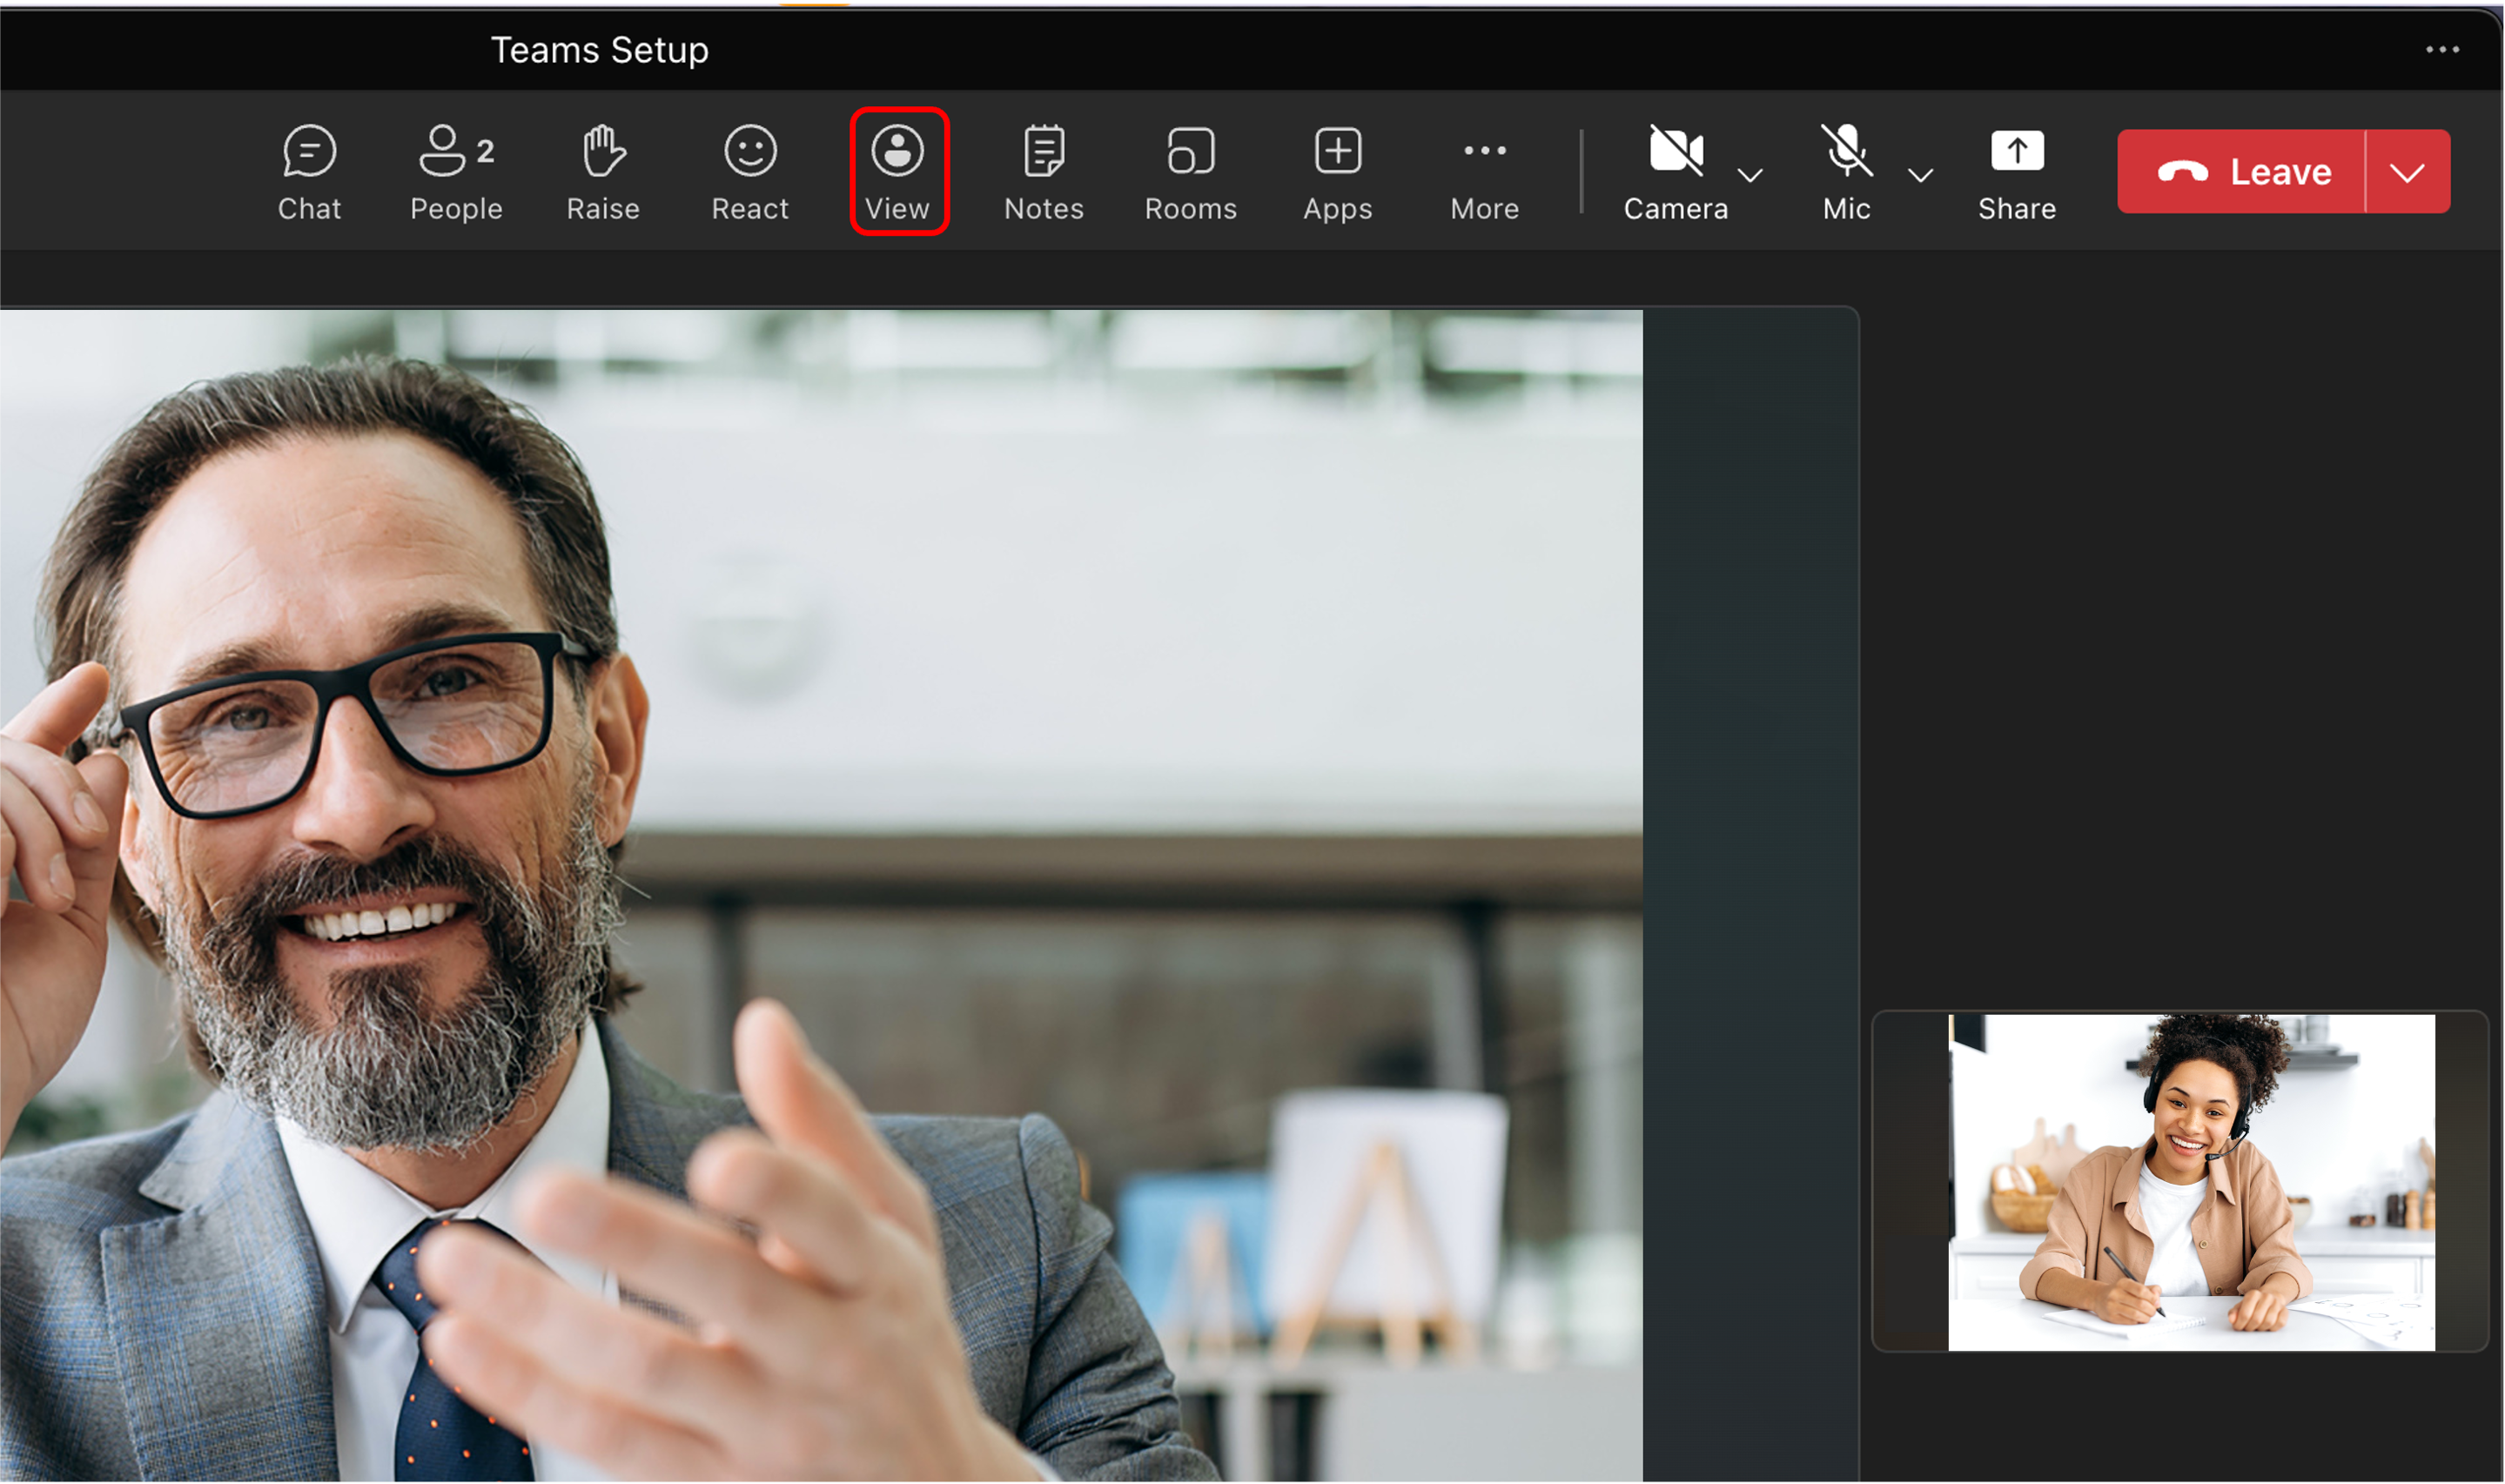
Click on ‘View’ at the top of the window
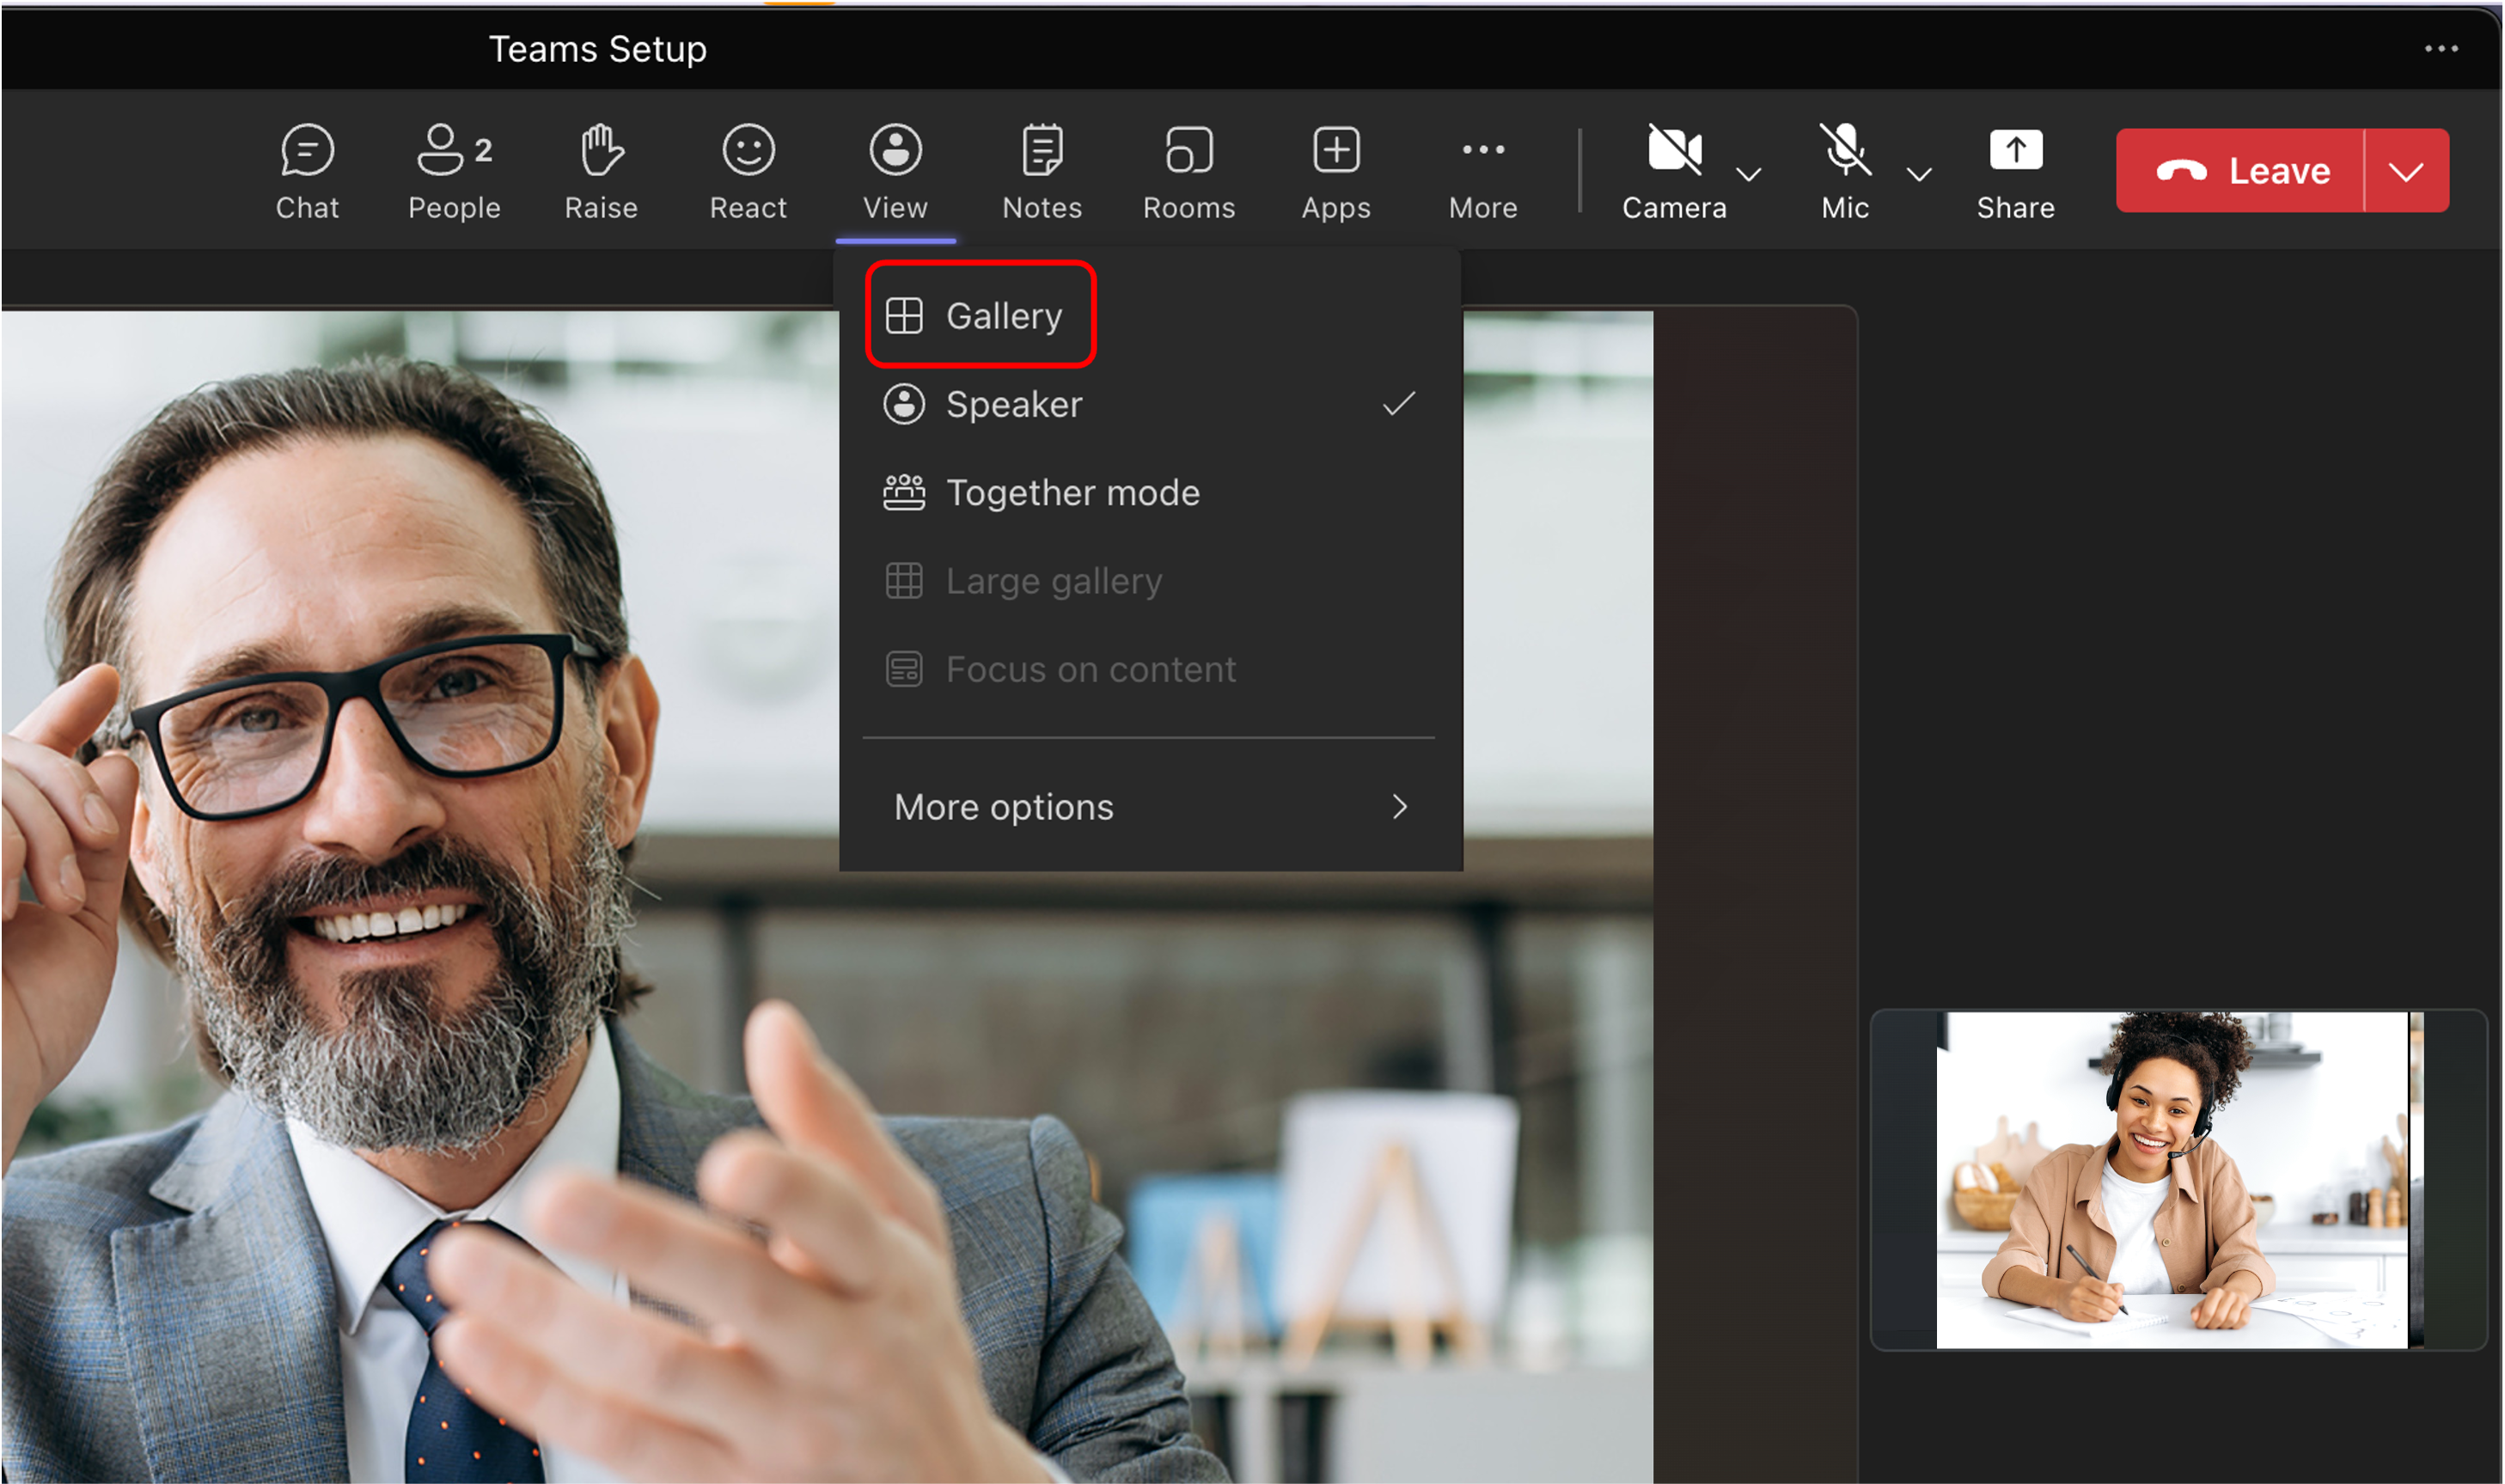
Click on ‘Gallery’ to switch to Gallery View
Your view should now look like the image below. You can check anytime by clicking ‘View’ and seeing if ‘Gallery’ is selected.
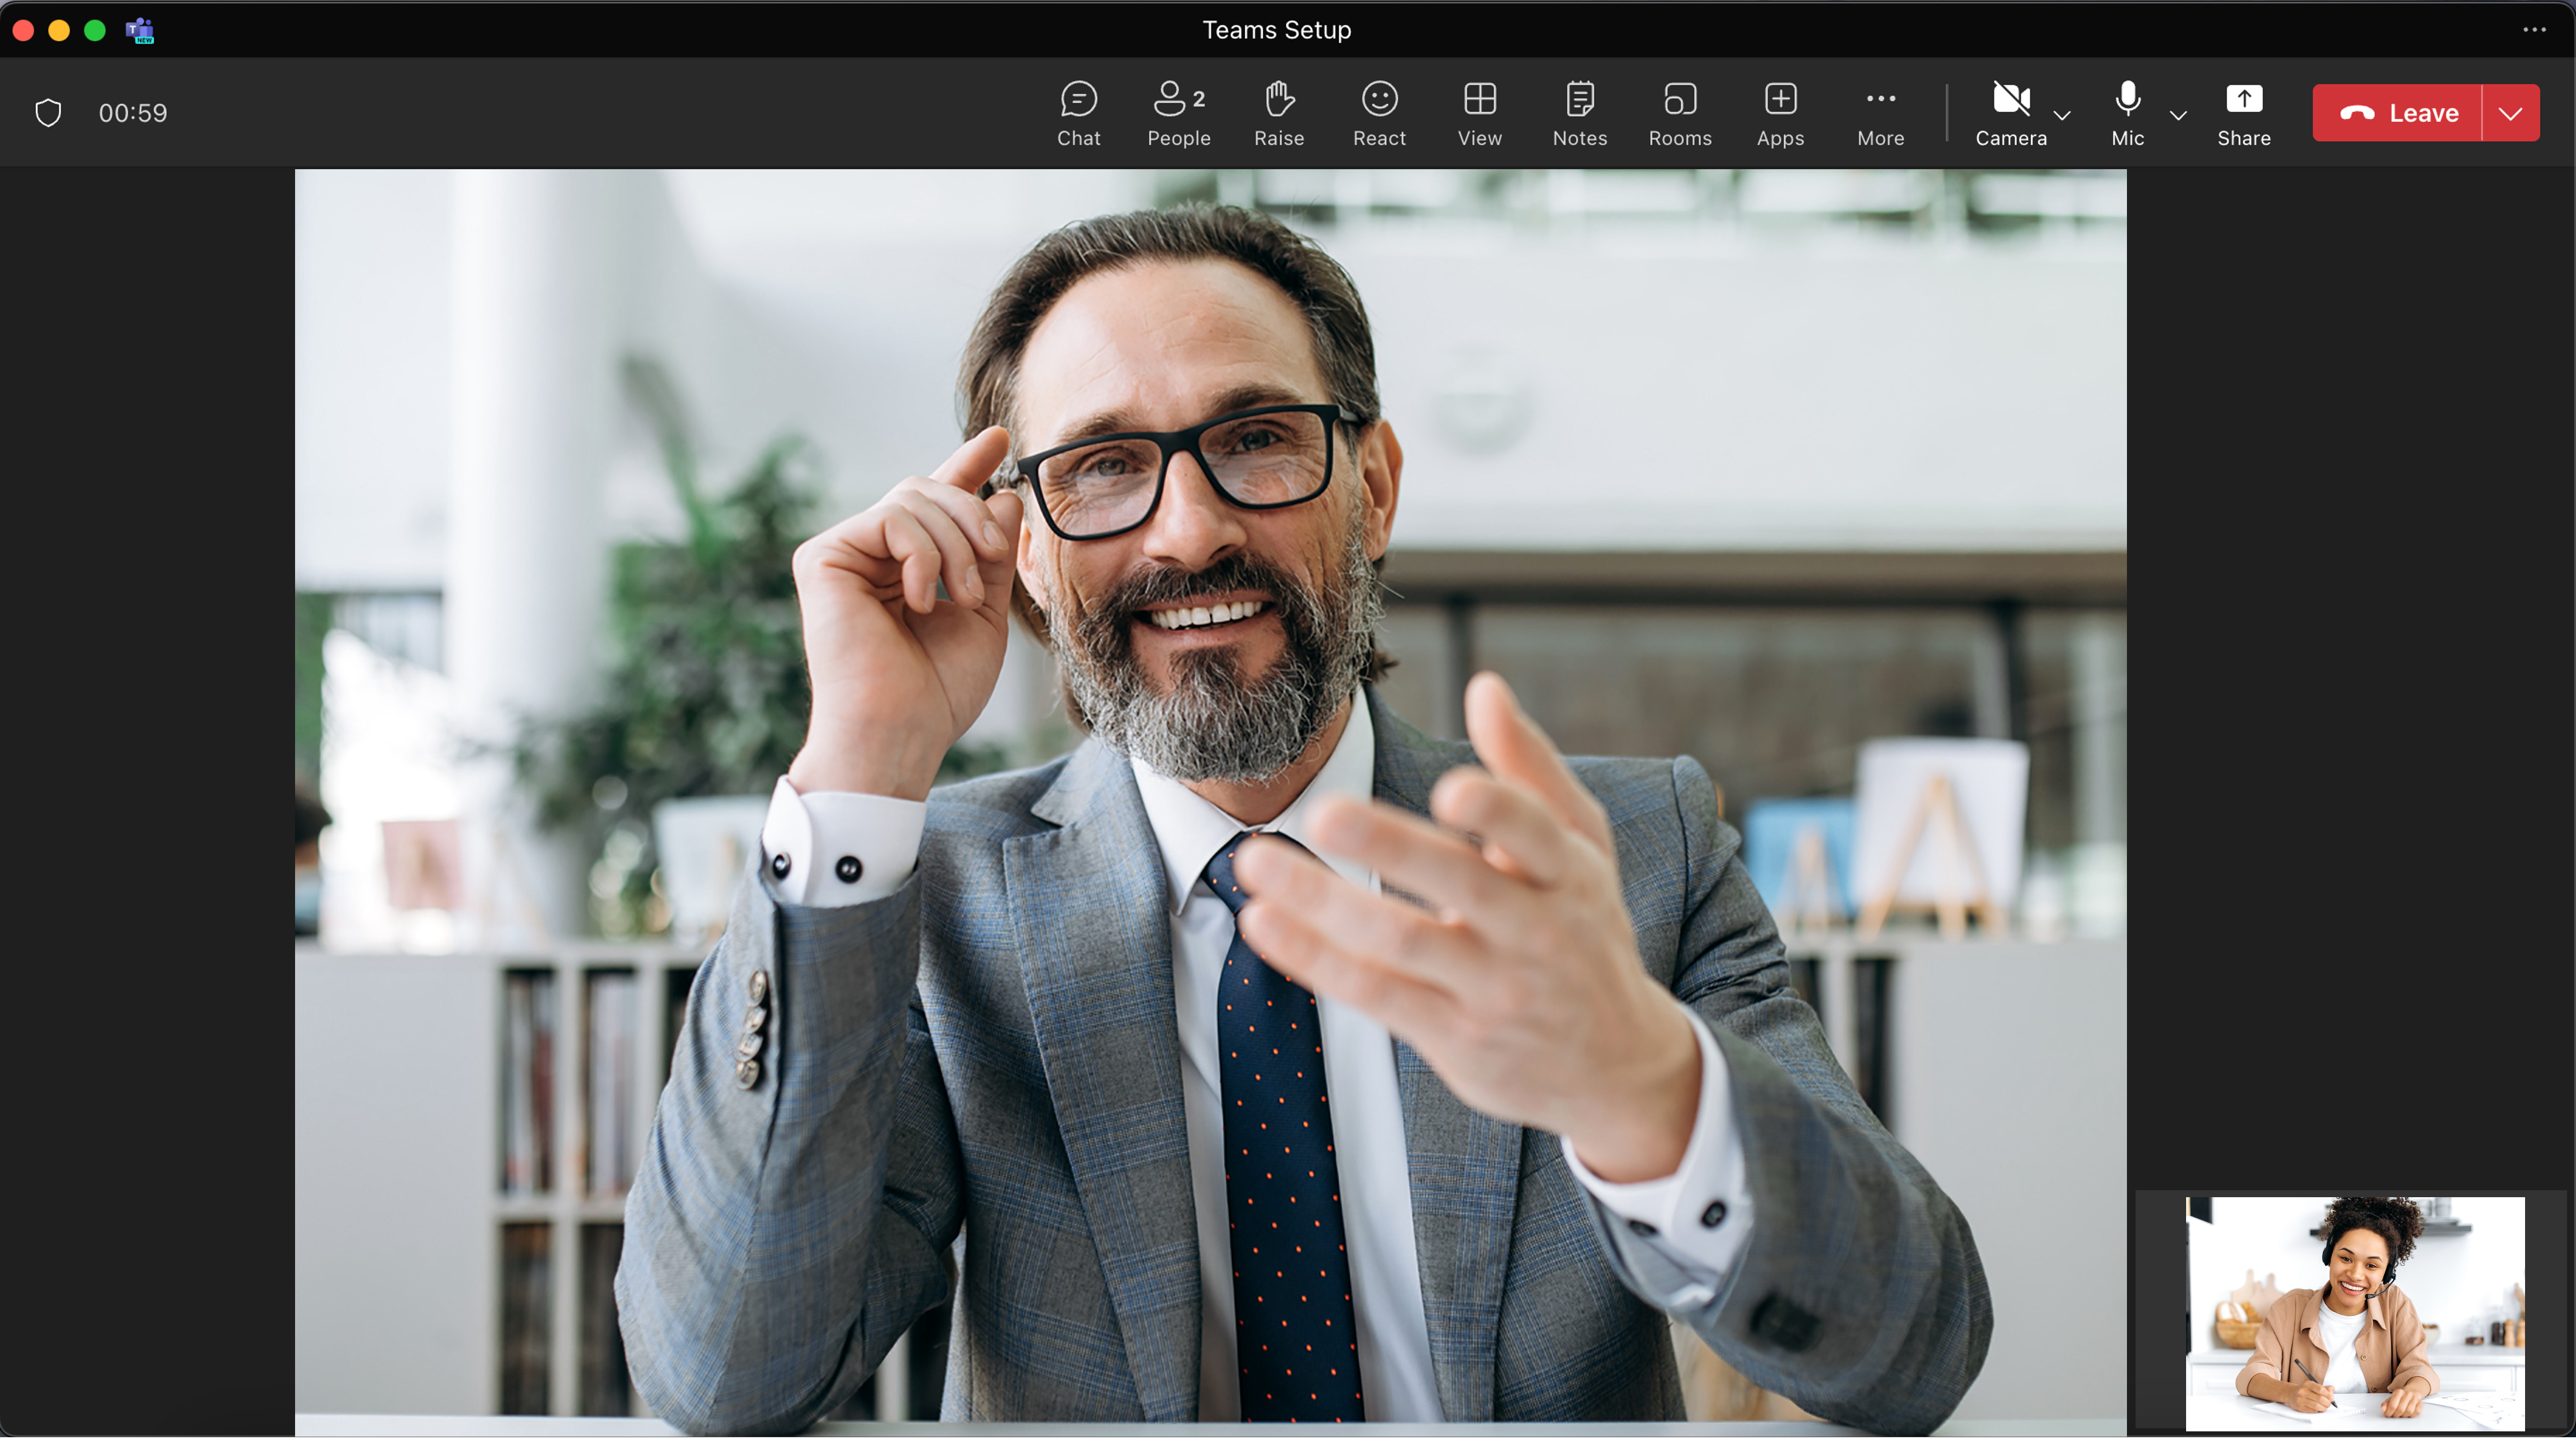
Gallery view will now be the default view for all future Teams calls.
Recording your Meeting
NB: to record on teams, it must be a previously scheduled meeting. It is not possible to record once the meeting has begun if it is an unscheduled meeting.
Ask the other participant if they consent to recording your meeting.
Join your scheduled meeting and ensure the other participant has joined as well
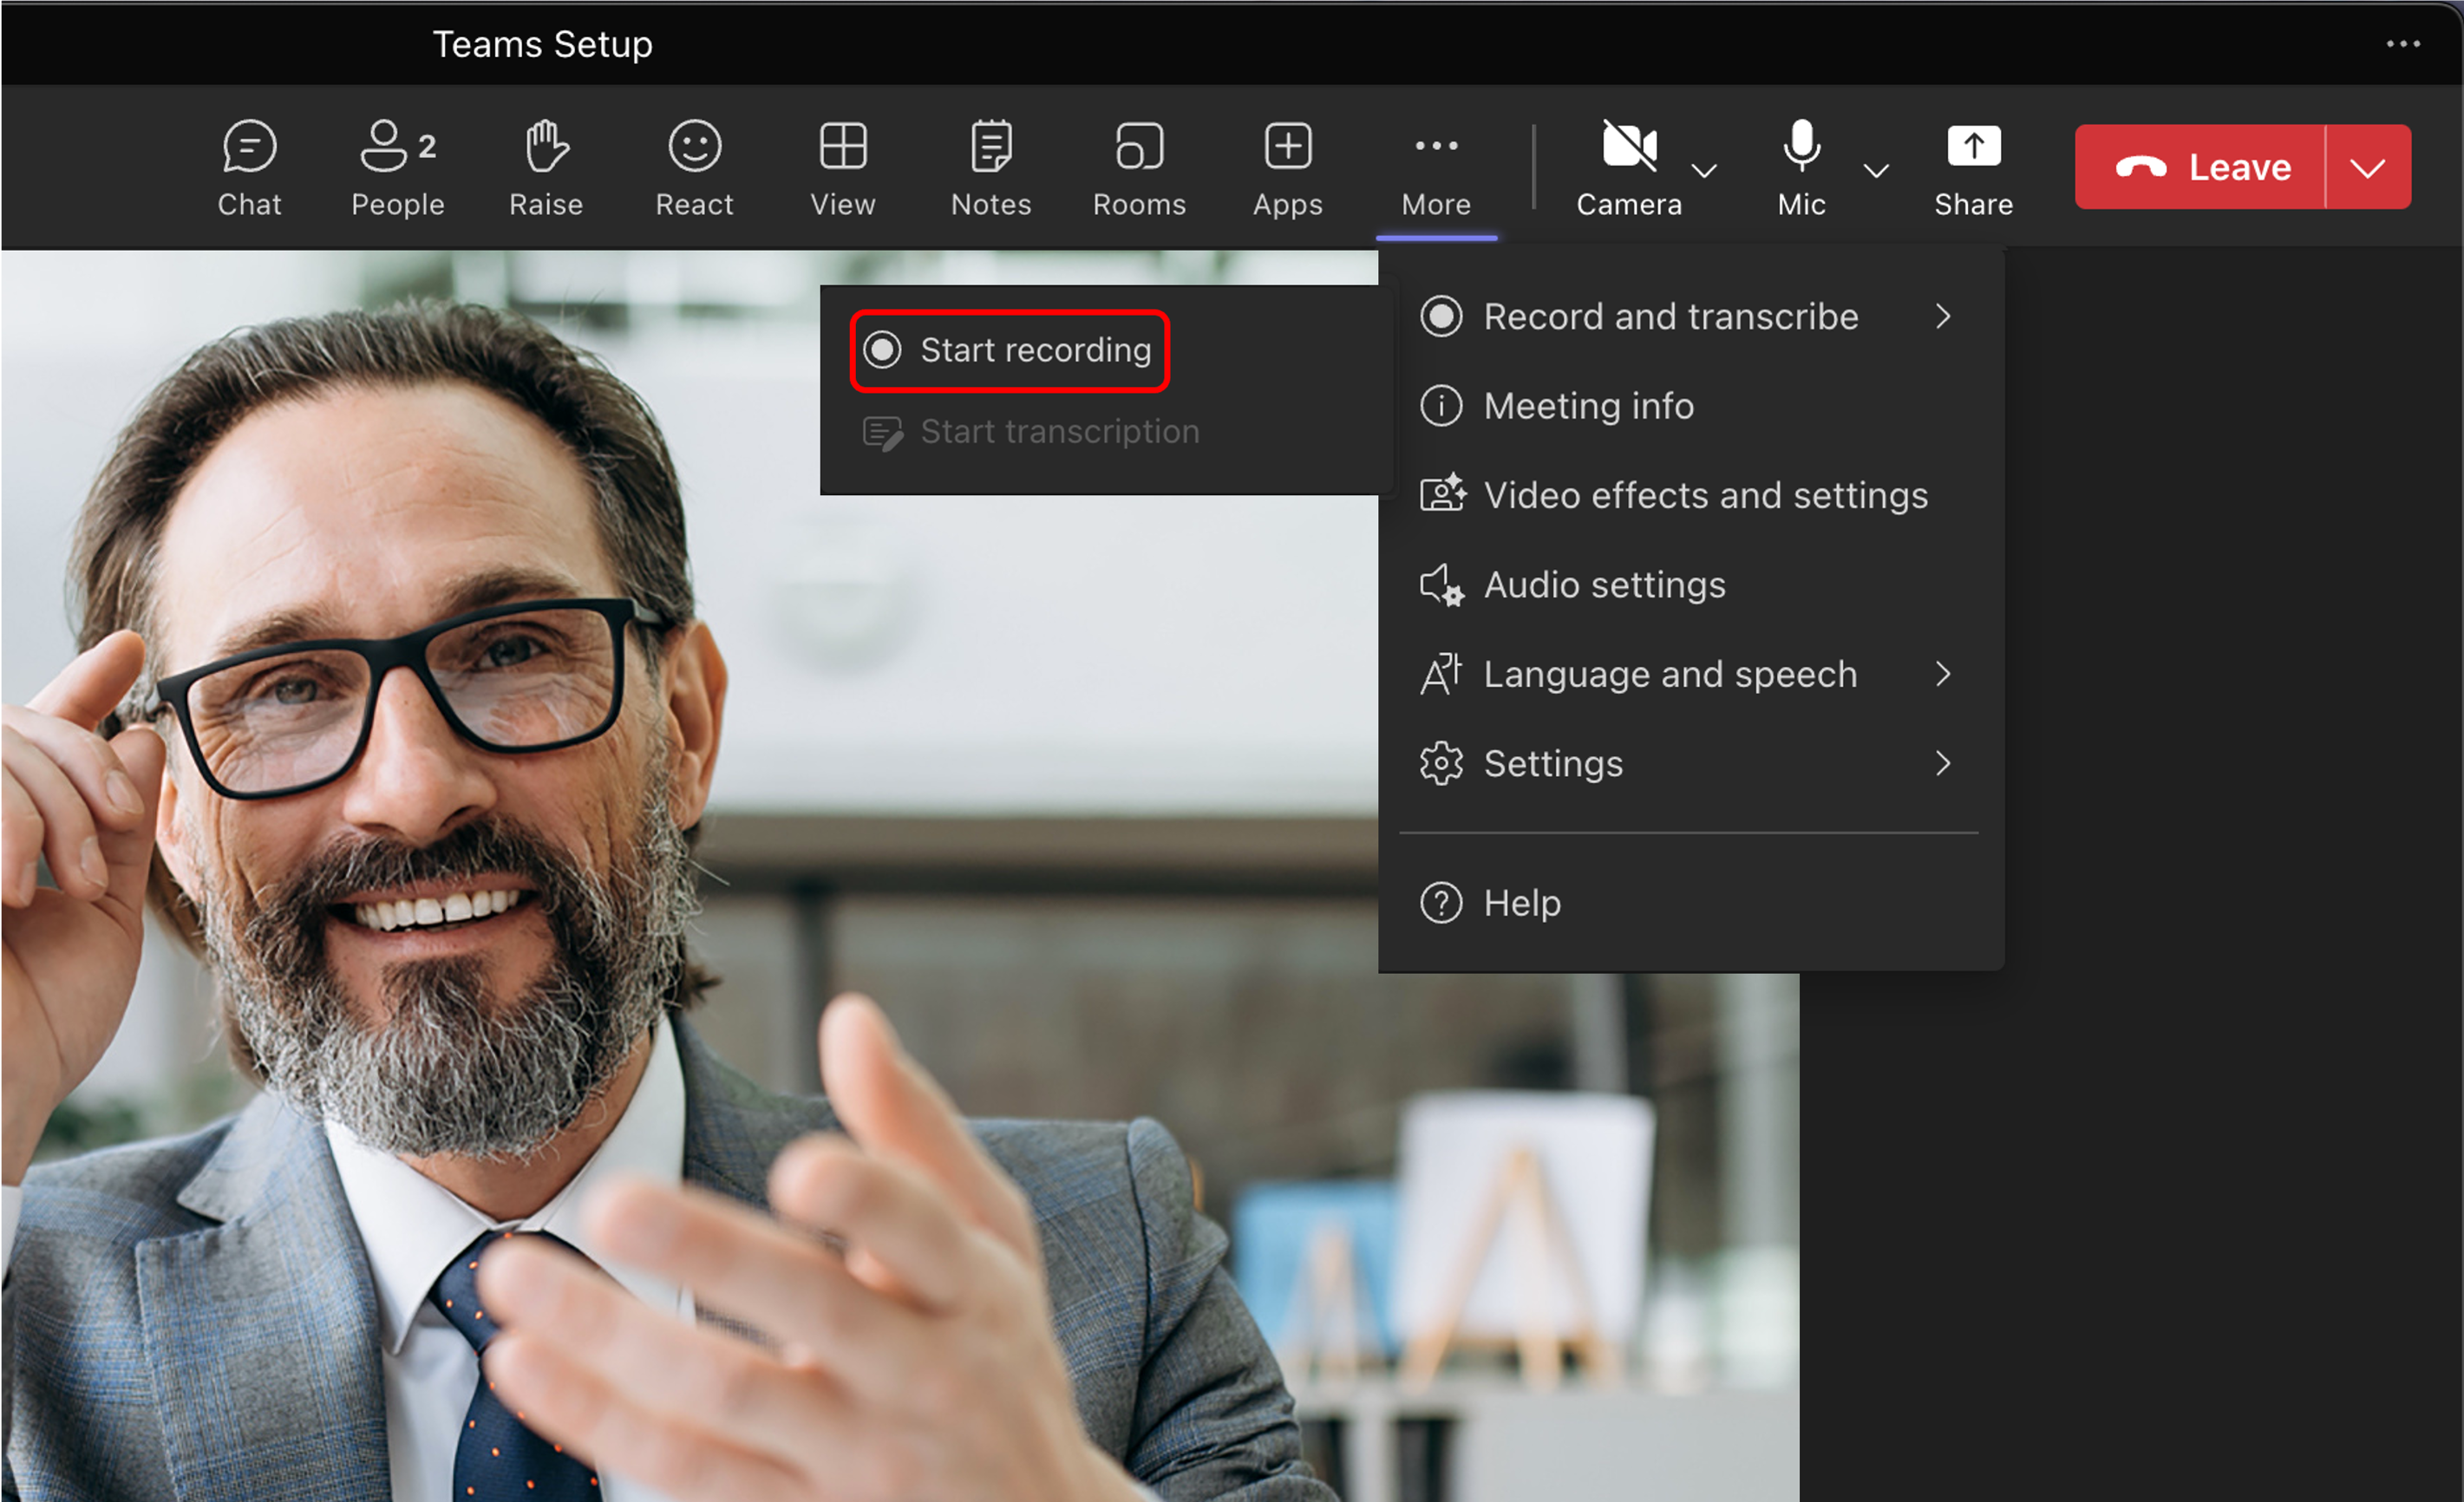
Click ‘More’ at the top of the window

Hover over ‘Record and transcribe’ and then click ‘Start recording’
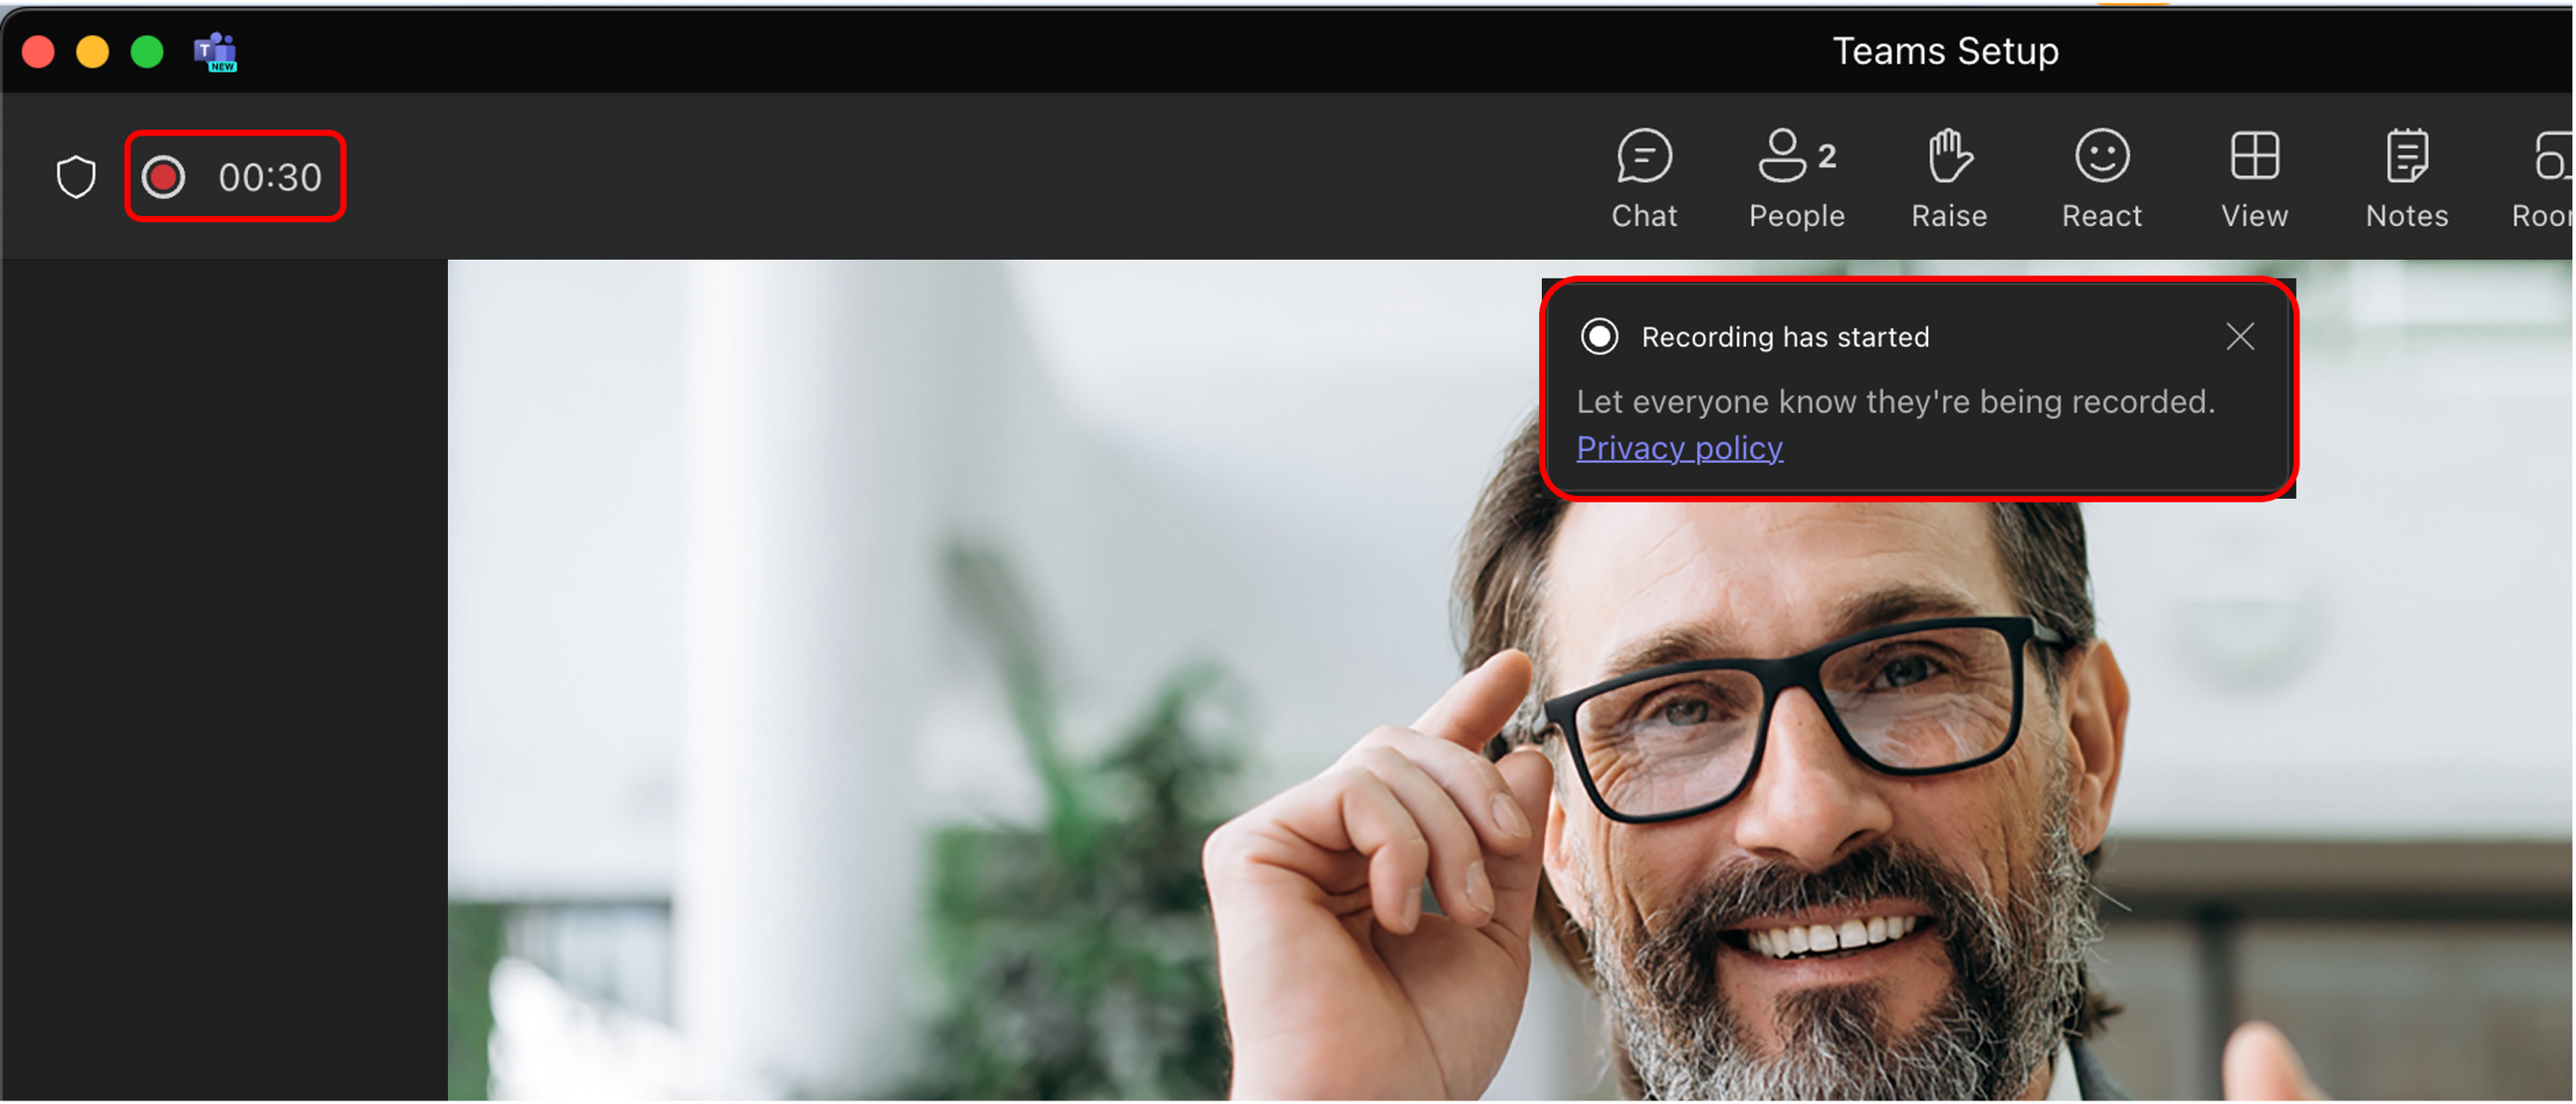
You can check you are recording by looking for the red dot in the top left and/or the pop up saying ‘Recording has started’
Ending your Recording
There are two ways to end your recording:
Option 1: All participants leave the meeting (this will end the recording automatically).
Option 2: By manually clicking ‘Stop recording’ (instructions below).
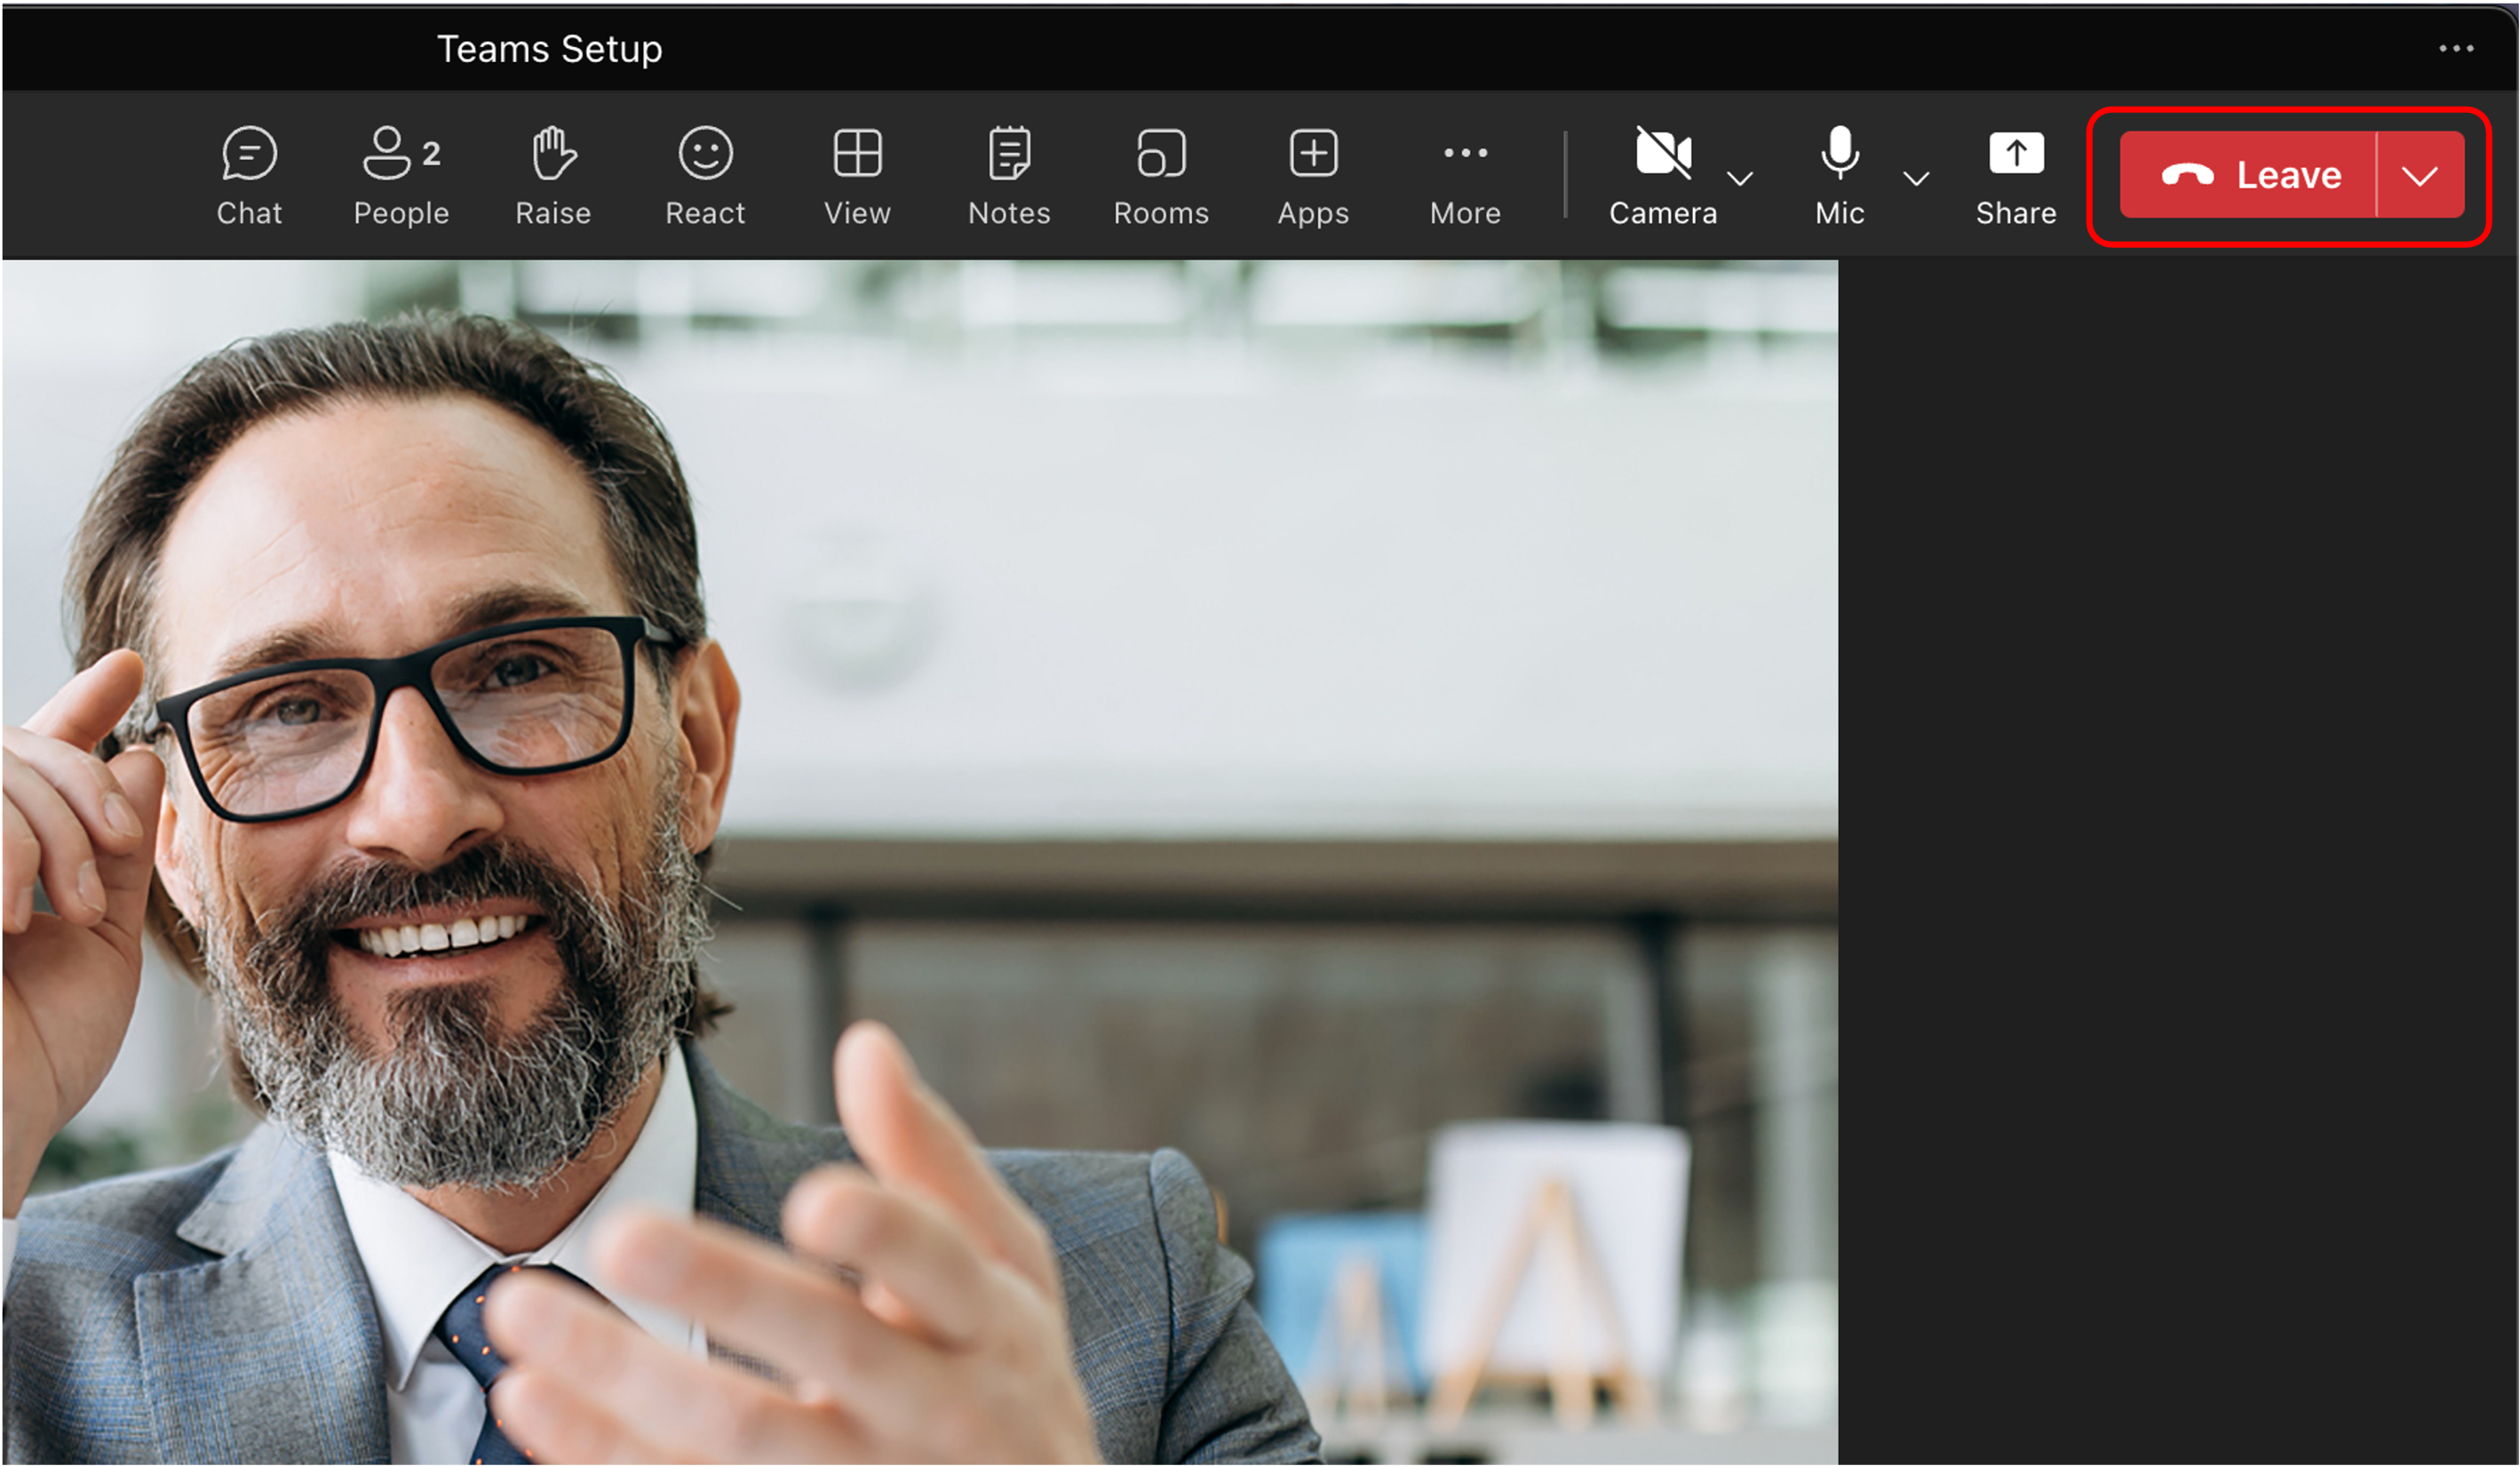
Option 1: All participants leave the meeting
To end the recording automatically, all participants in the meeting need to ‘Leave’ the meeting by clicking the red ‘Leave’ button in the top-right of the screen.
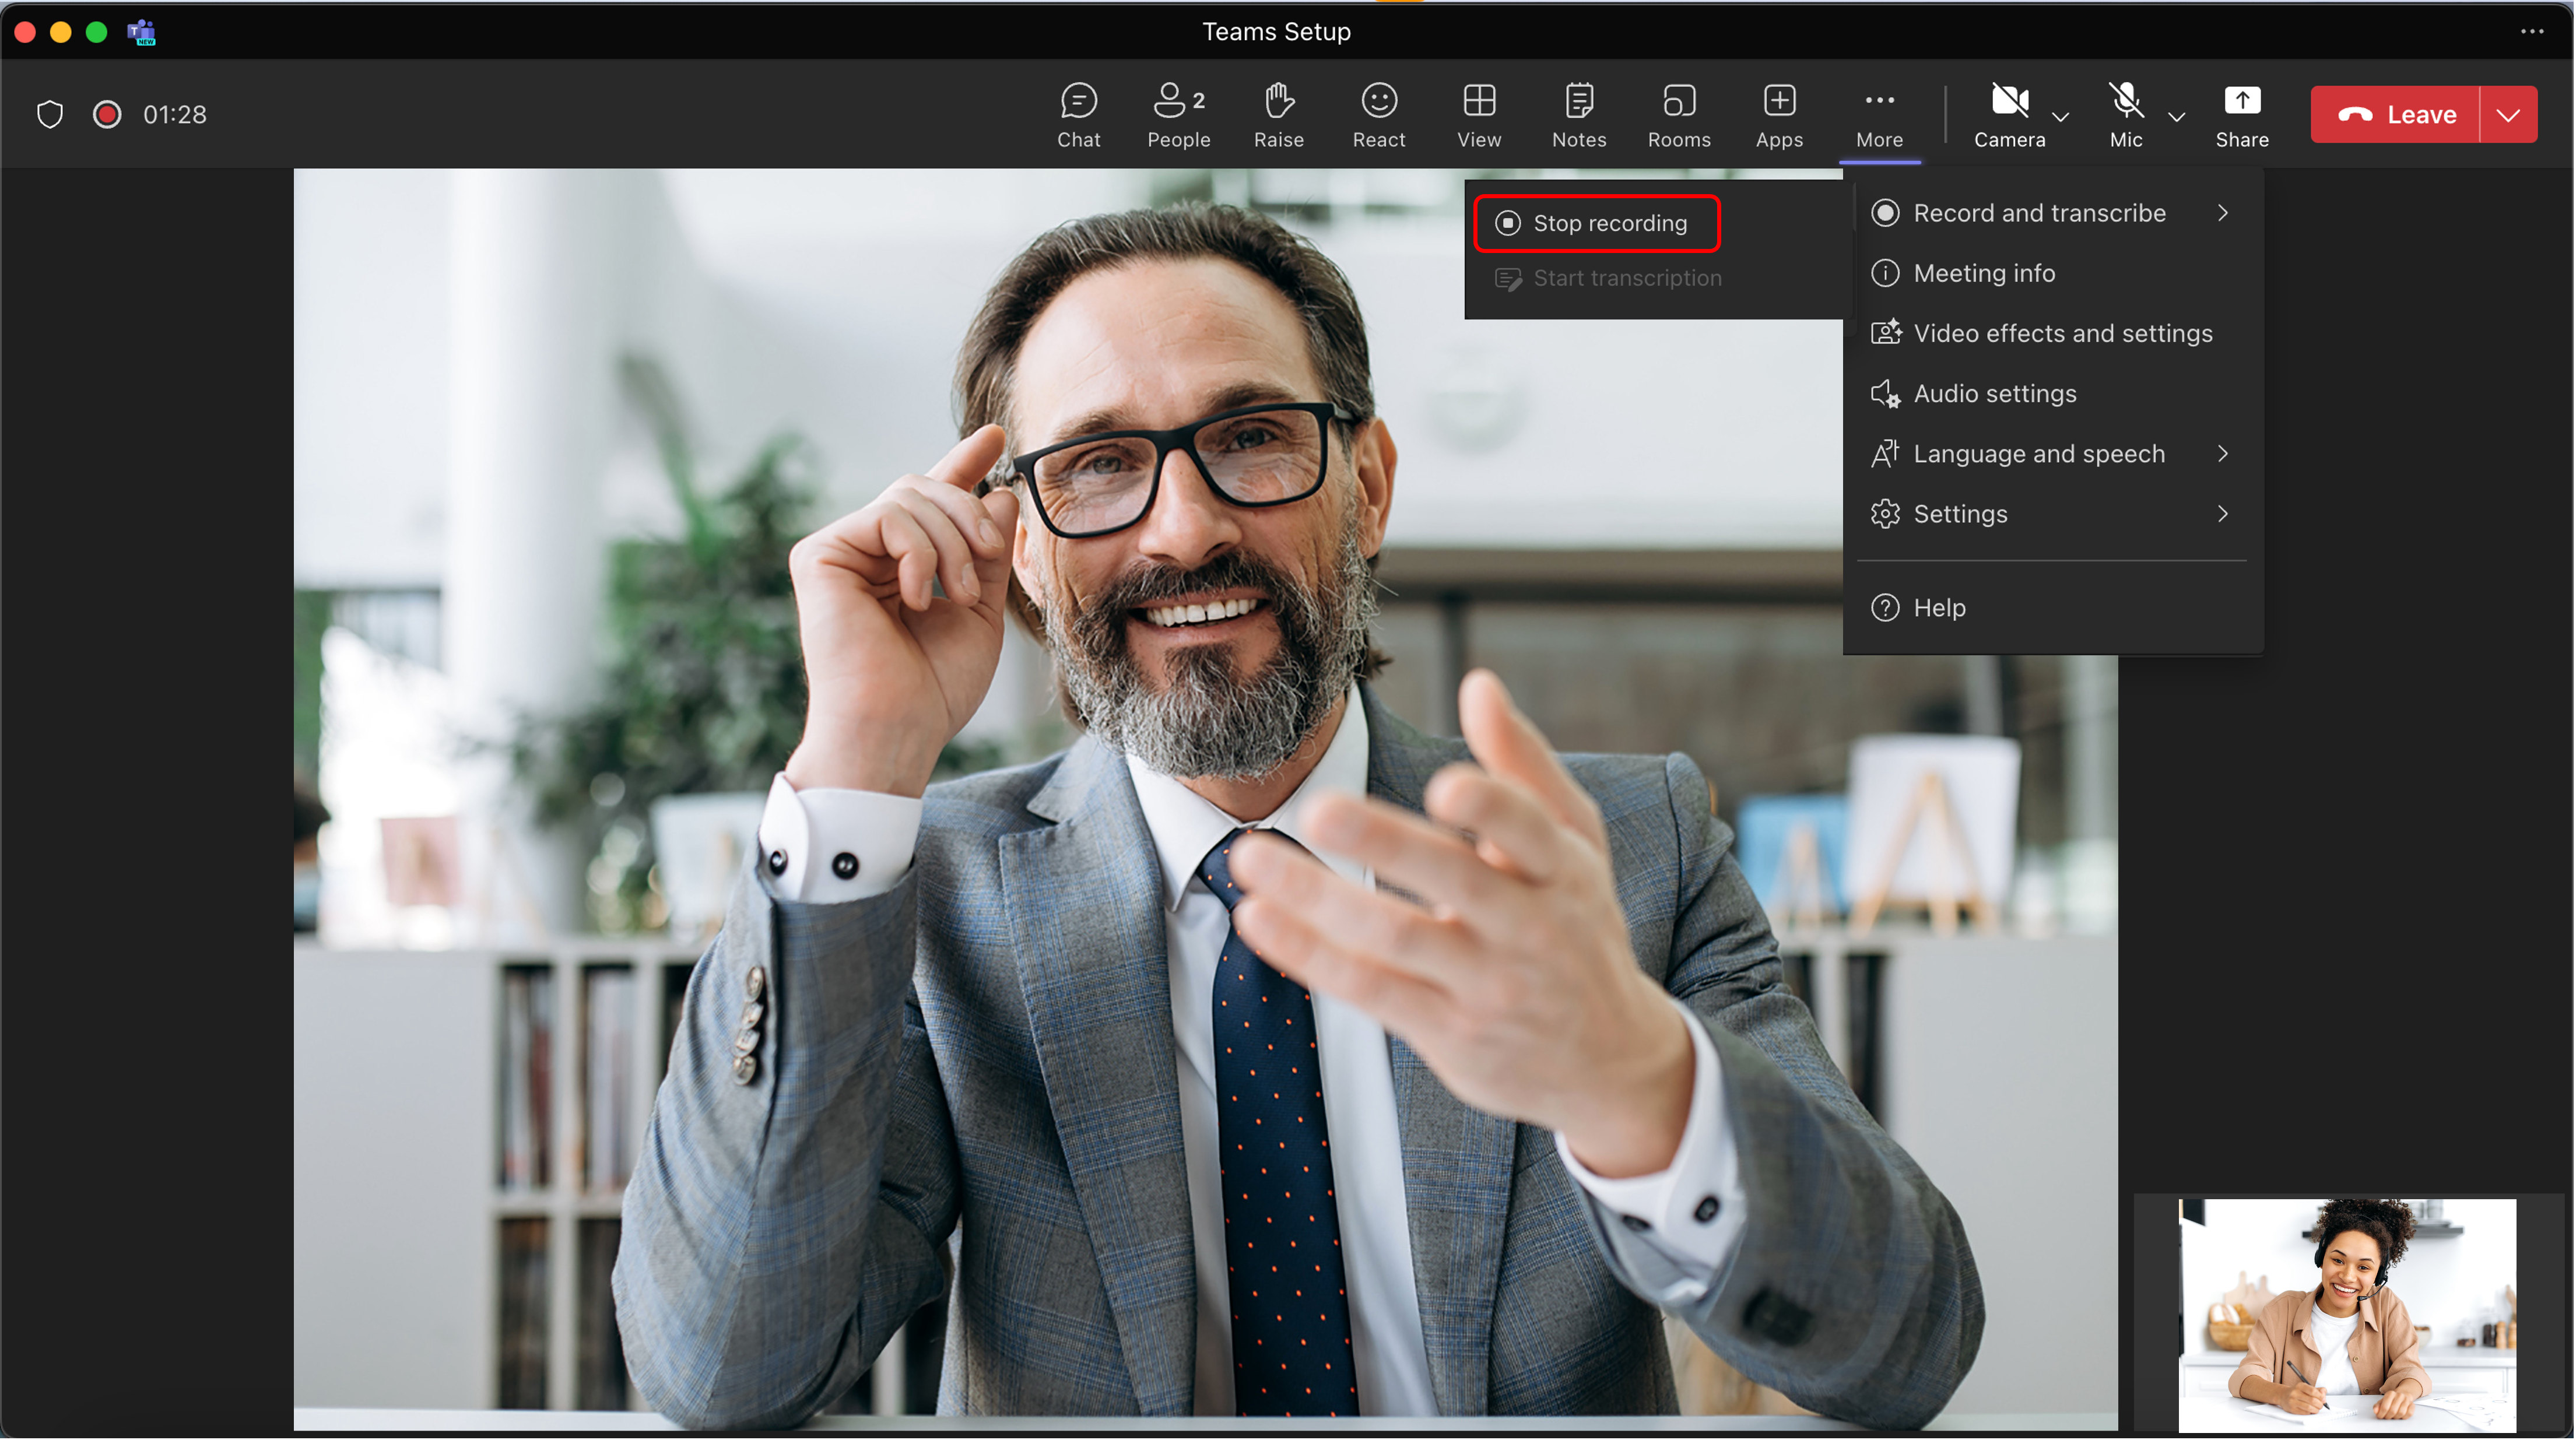
Option 2: By manually clicking ‘Stop recording’
Click on the 3 dots for more and then hover your mouse over ‘Record and transcribe’
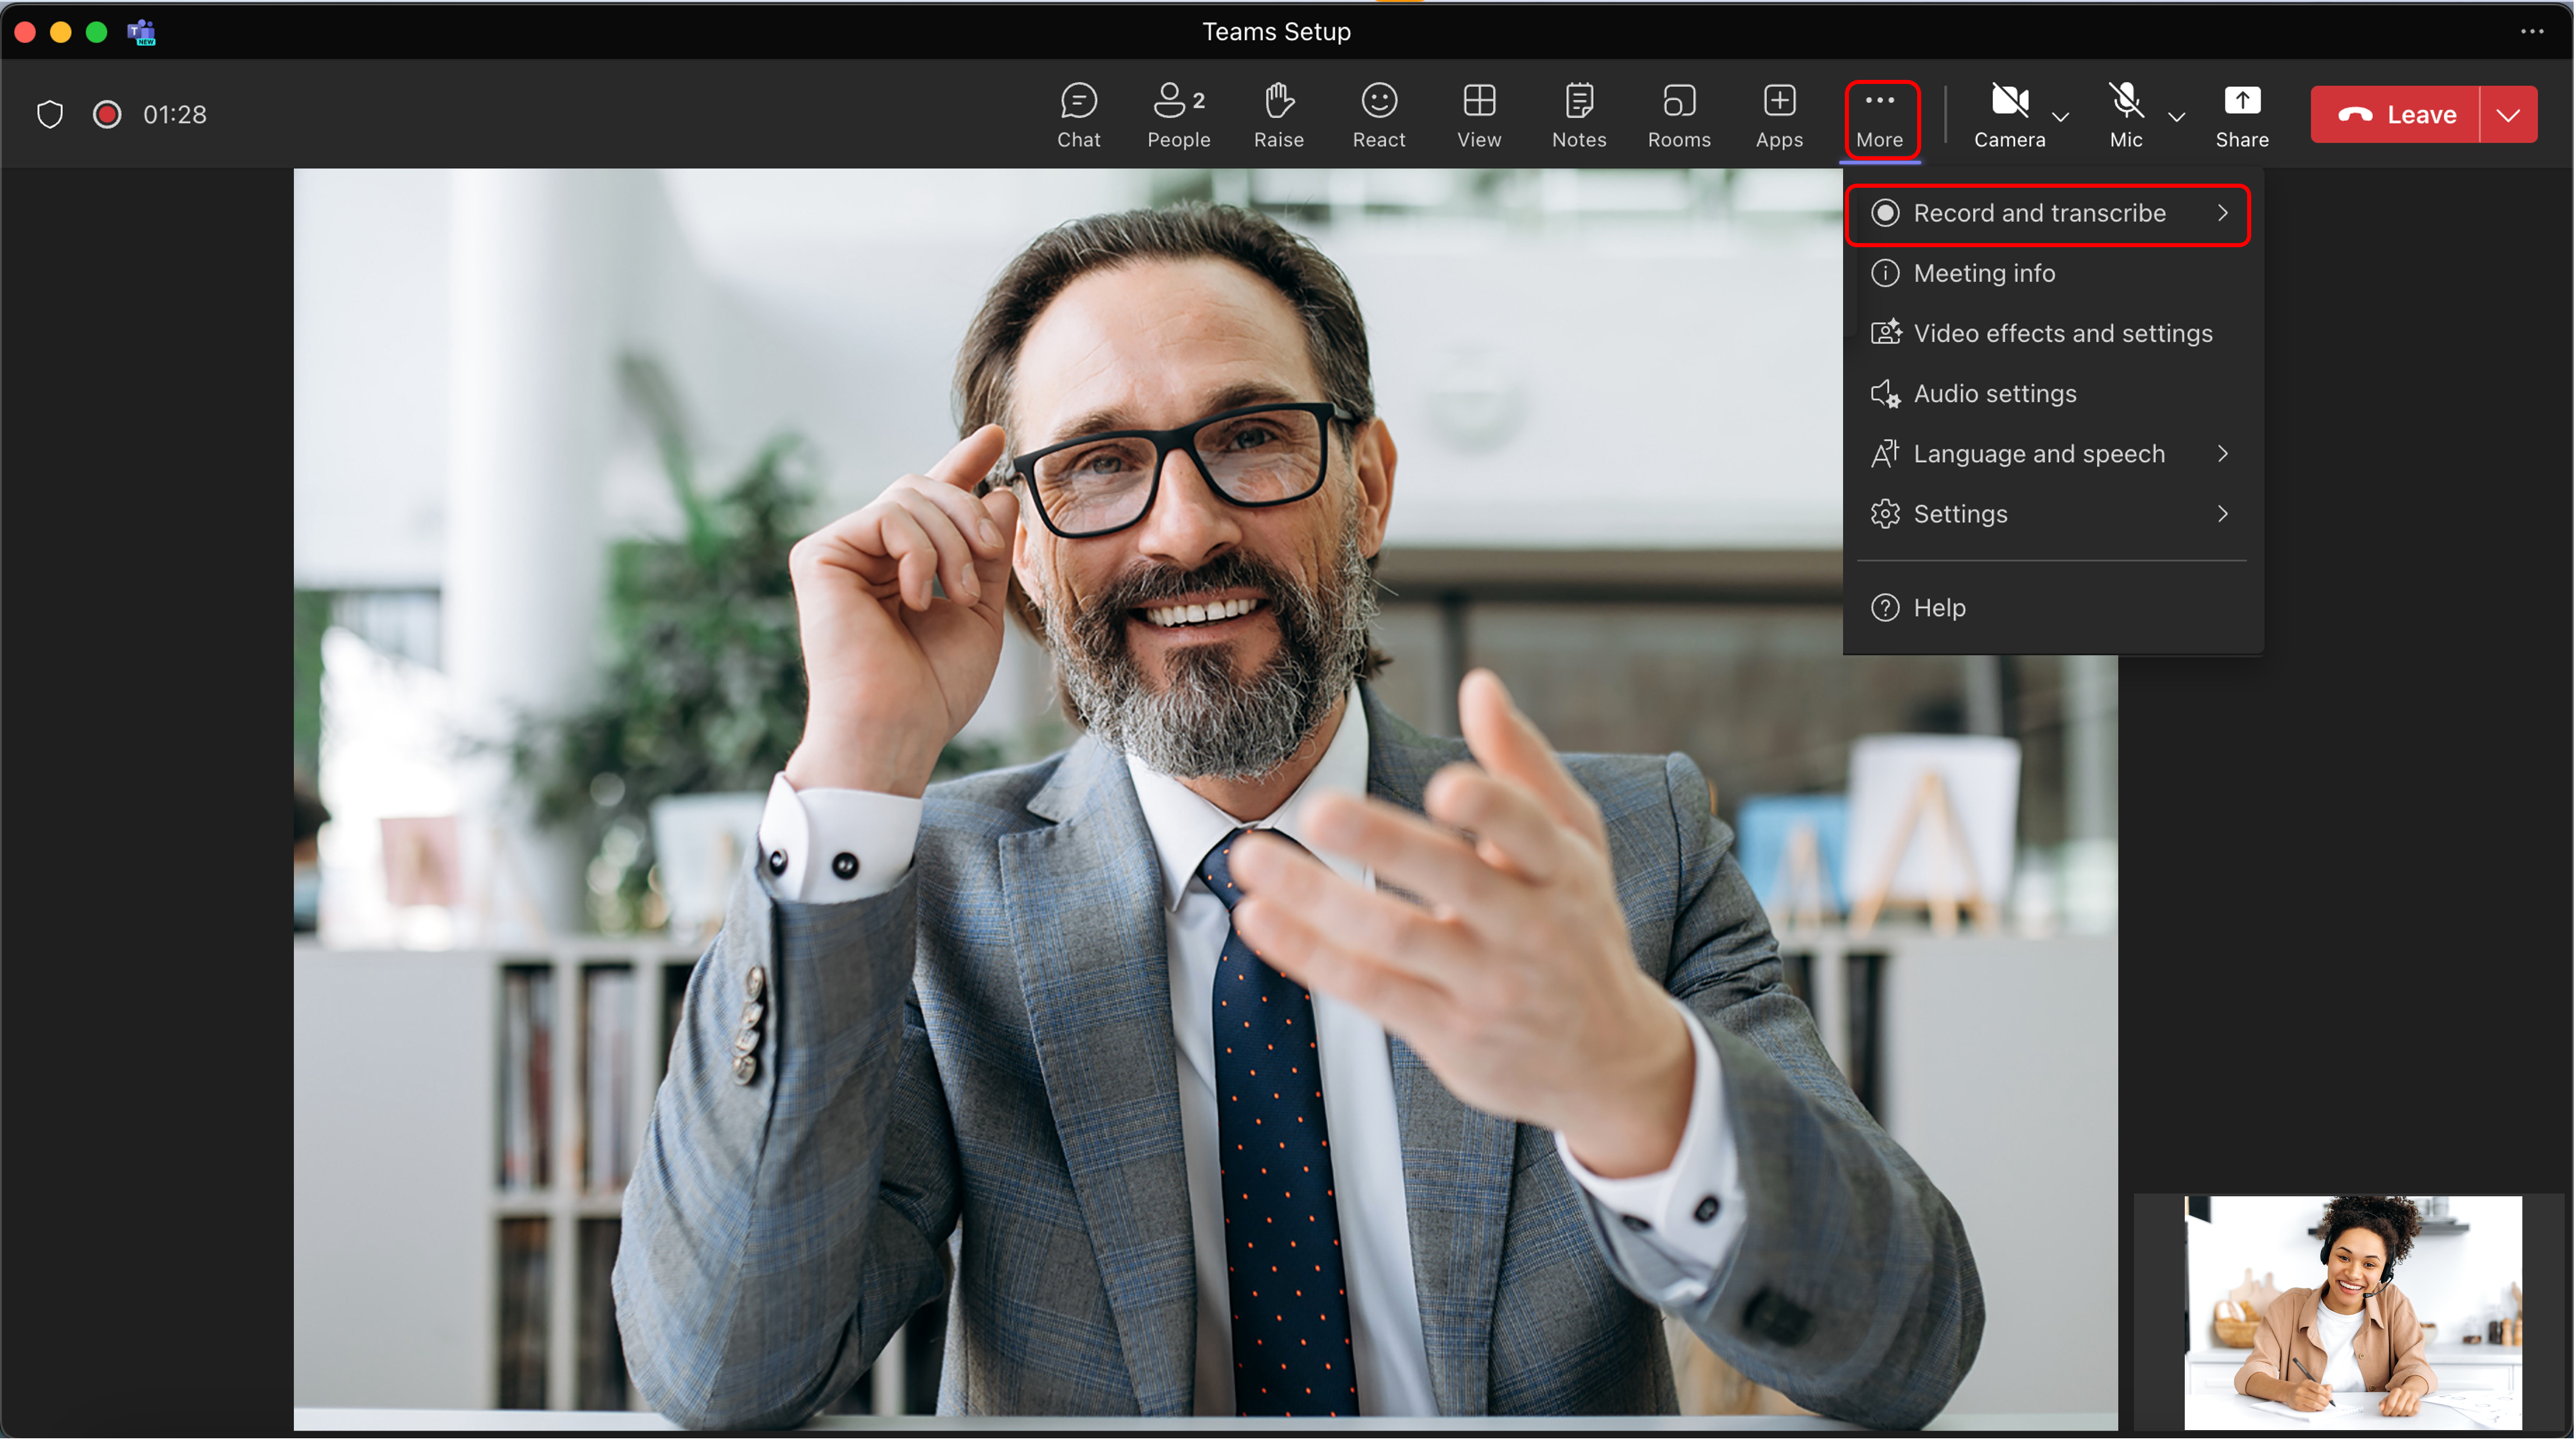
Click ‘Stop recording’ and confirm on the pop up by clicking ‘Stop’.
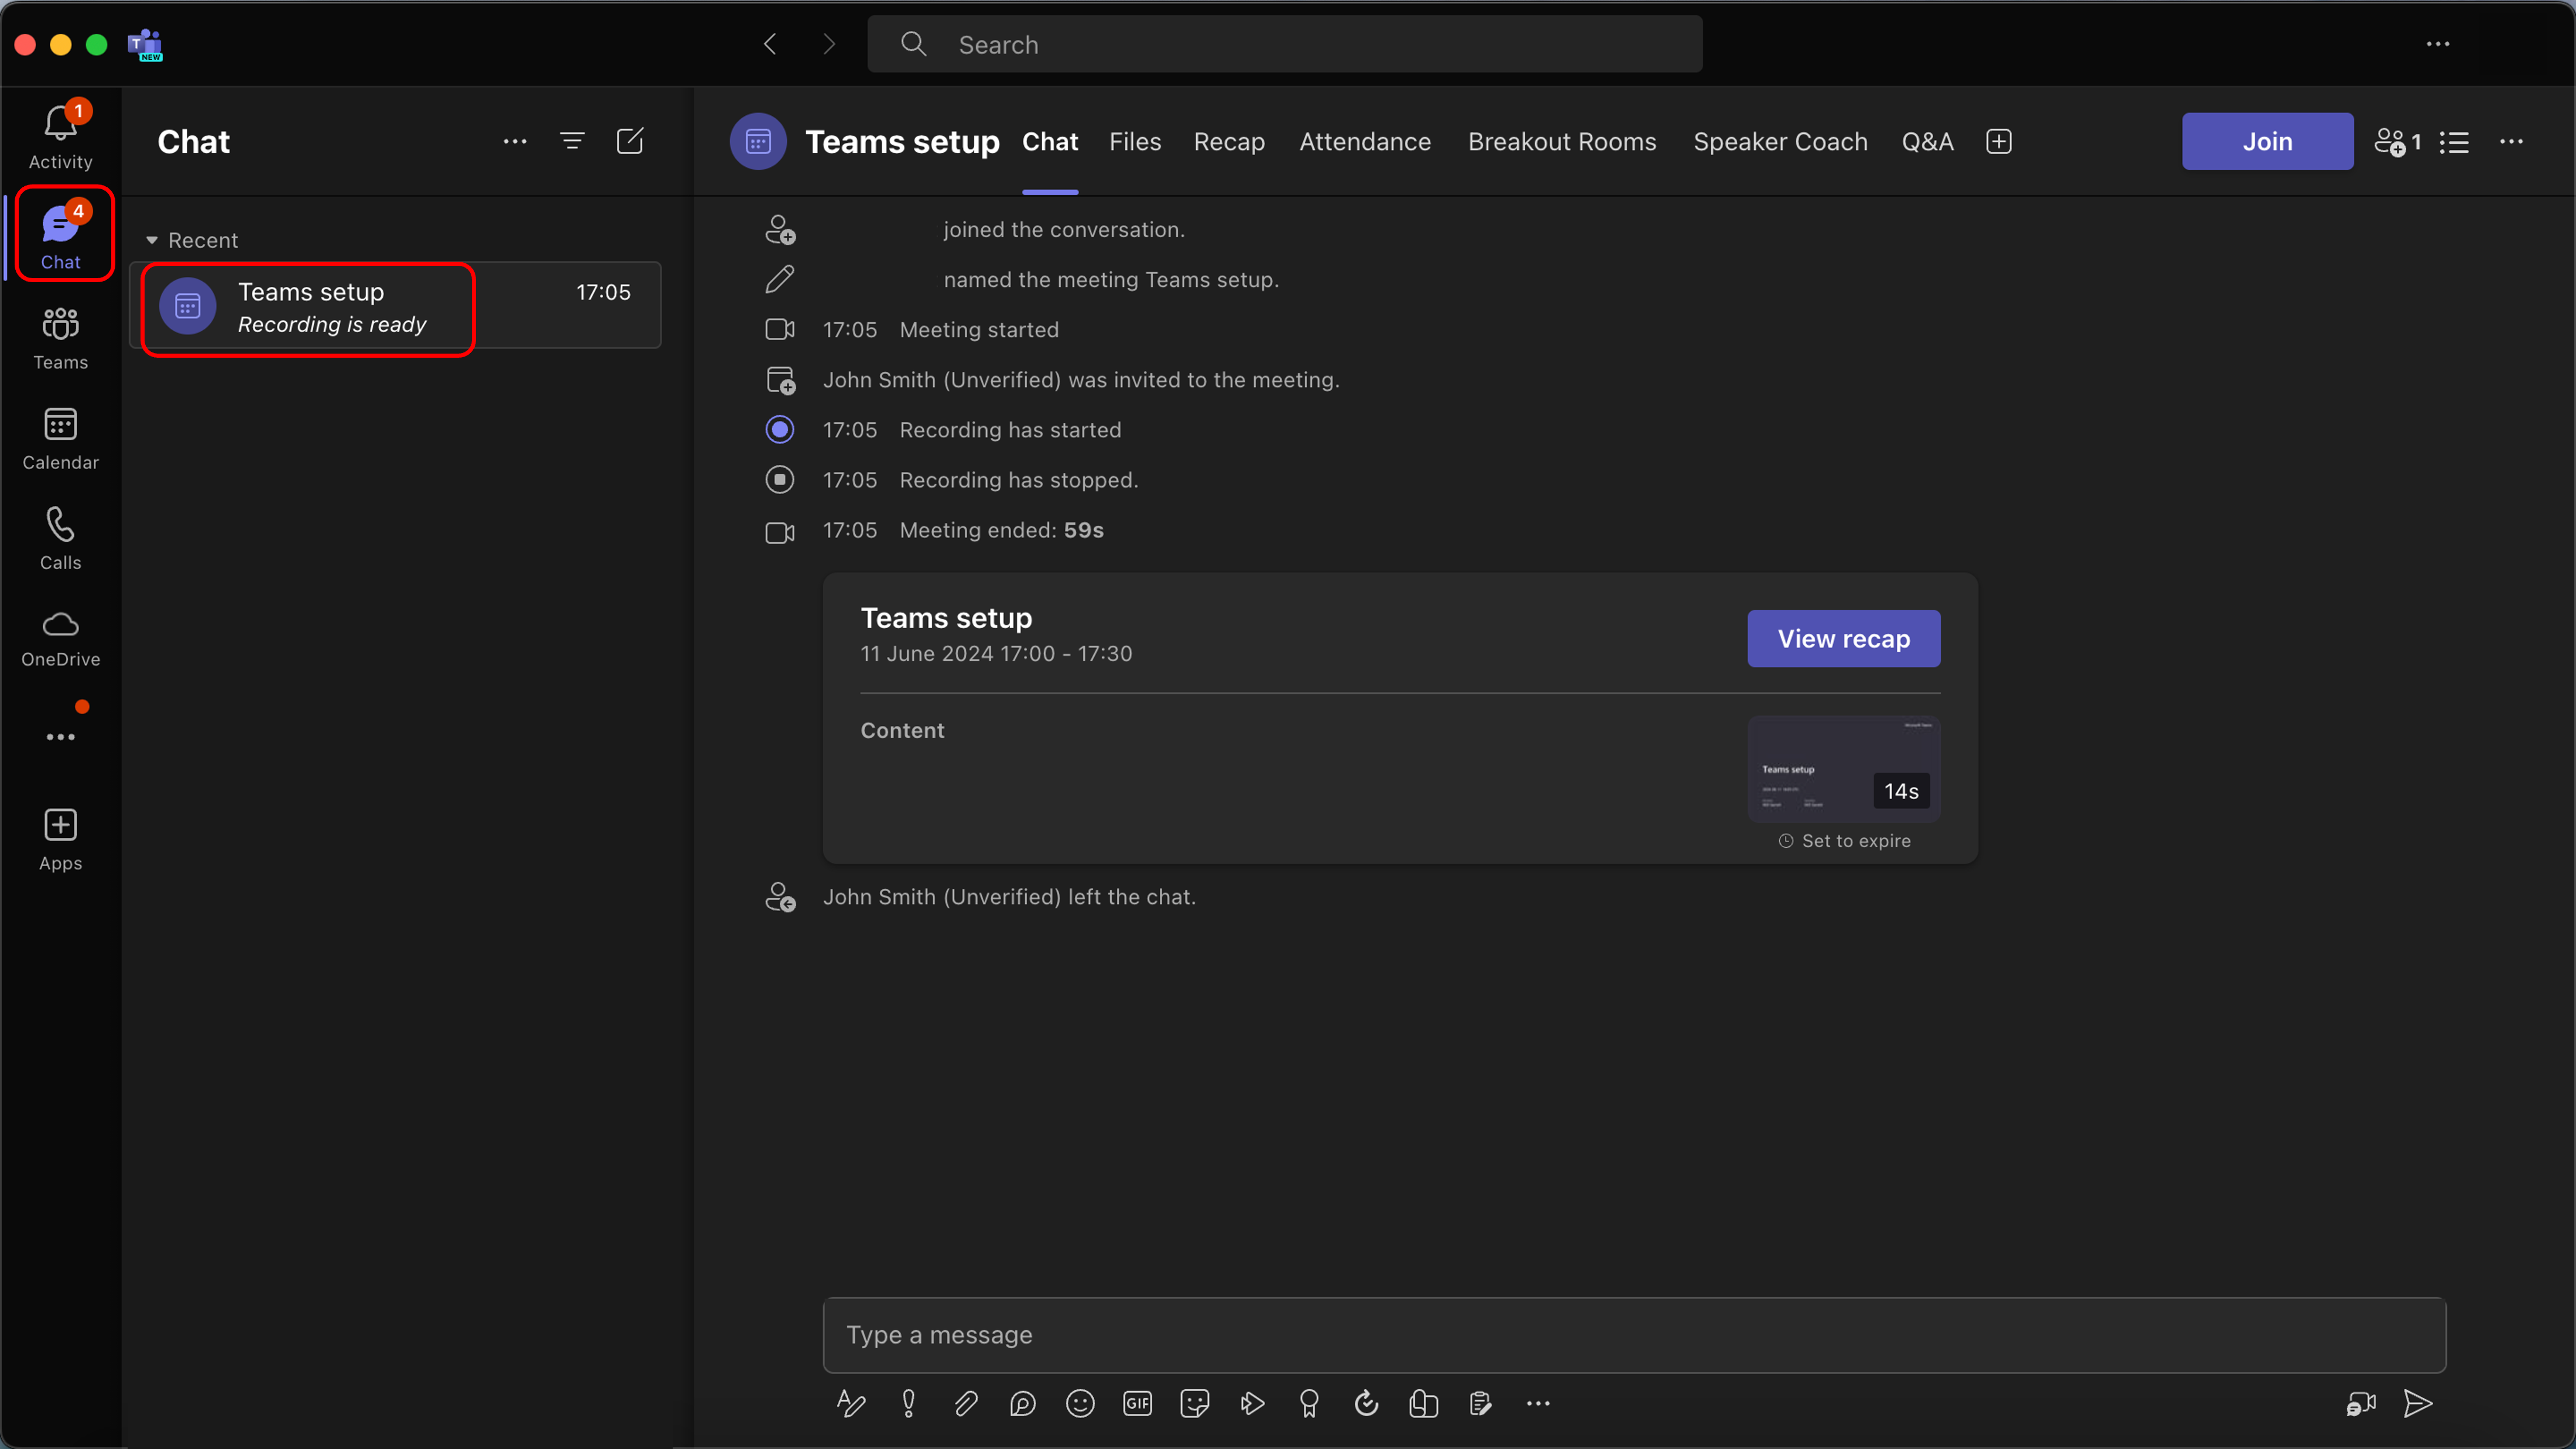
Collecting your Recording
Your recording will always save to the meeting room chat
Navigate to the chat in Microsoft Teams and open the relevant meeting chat. For this example, the meeting was called ‘Teams Setup’
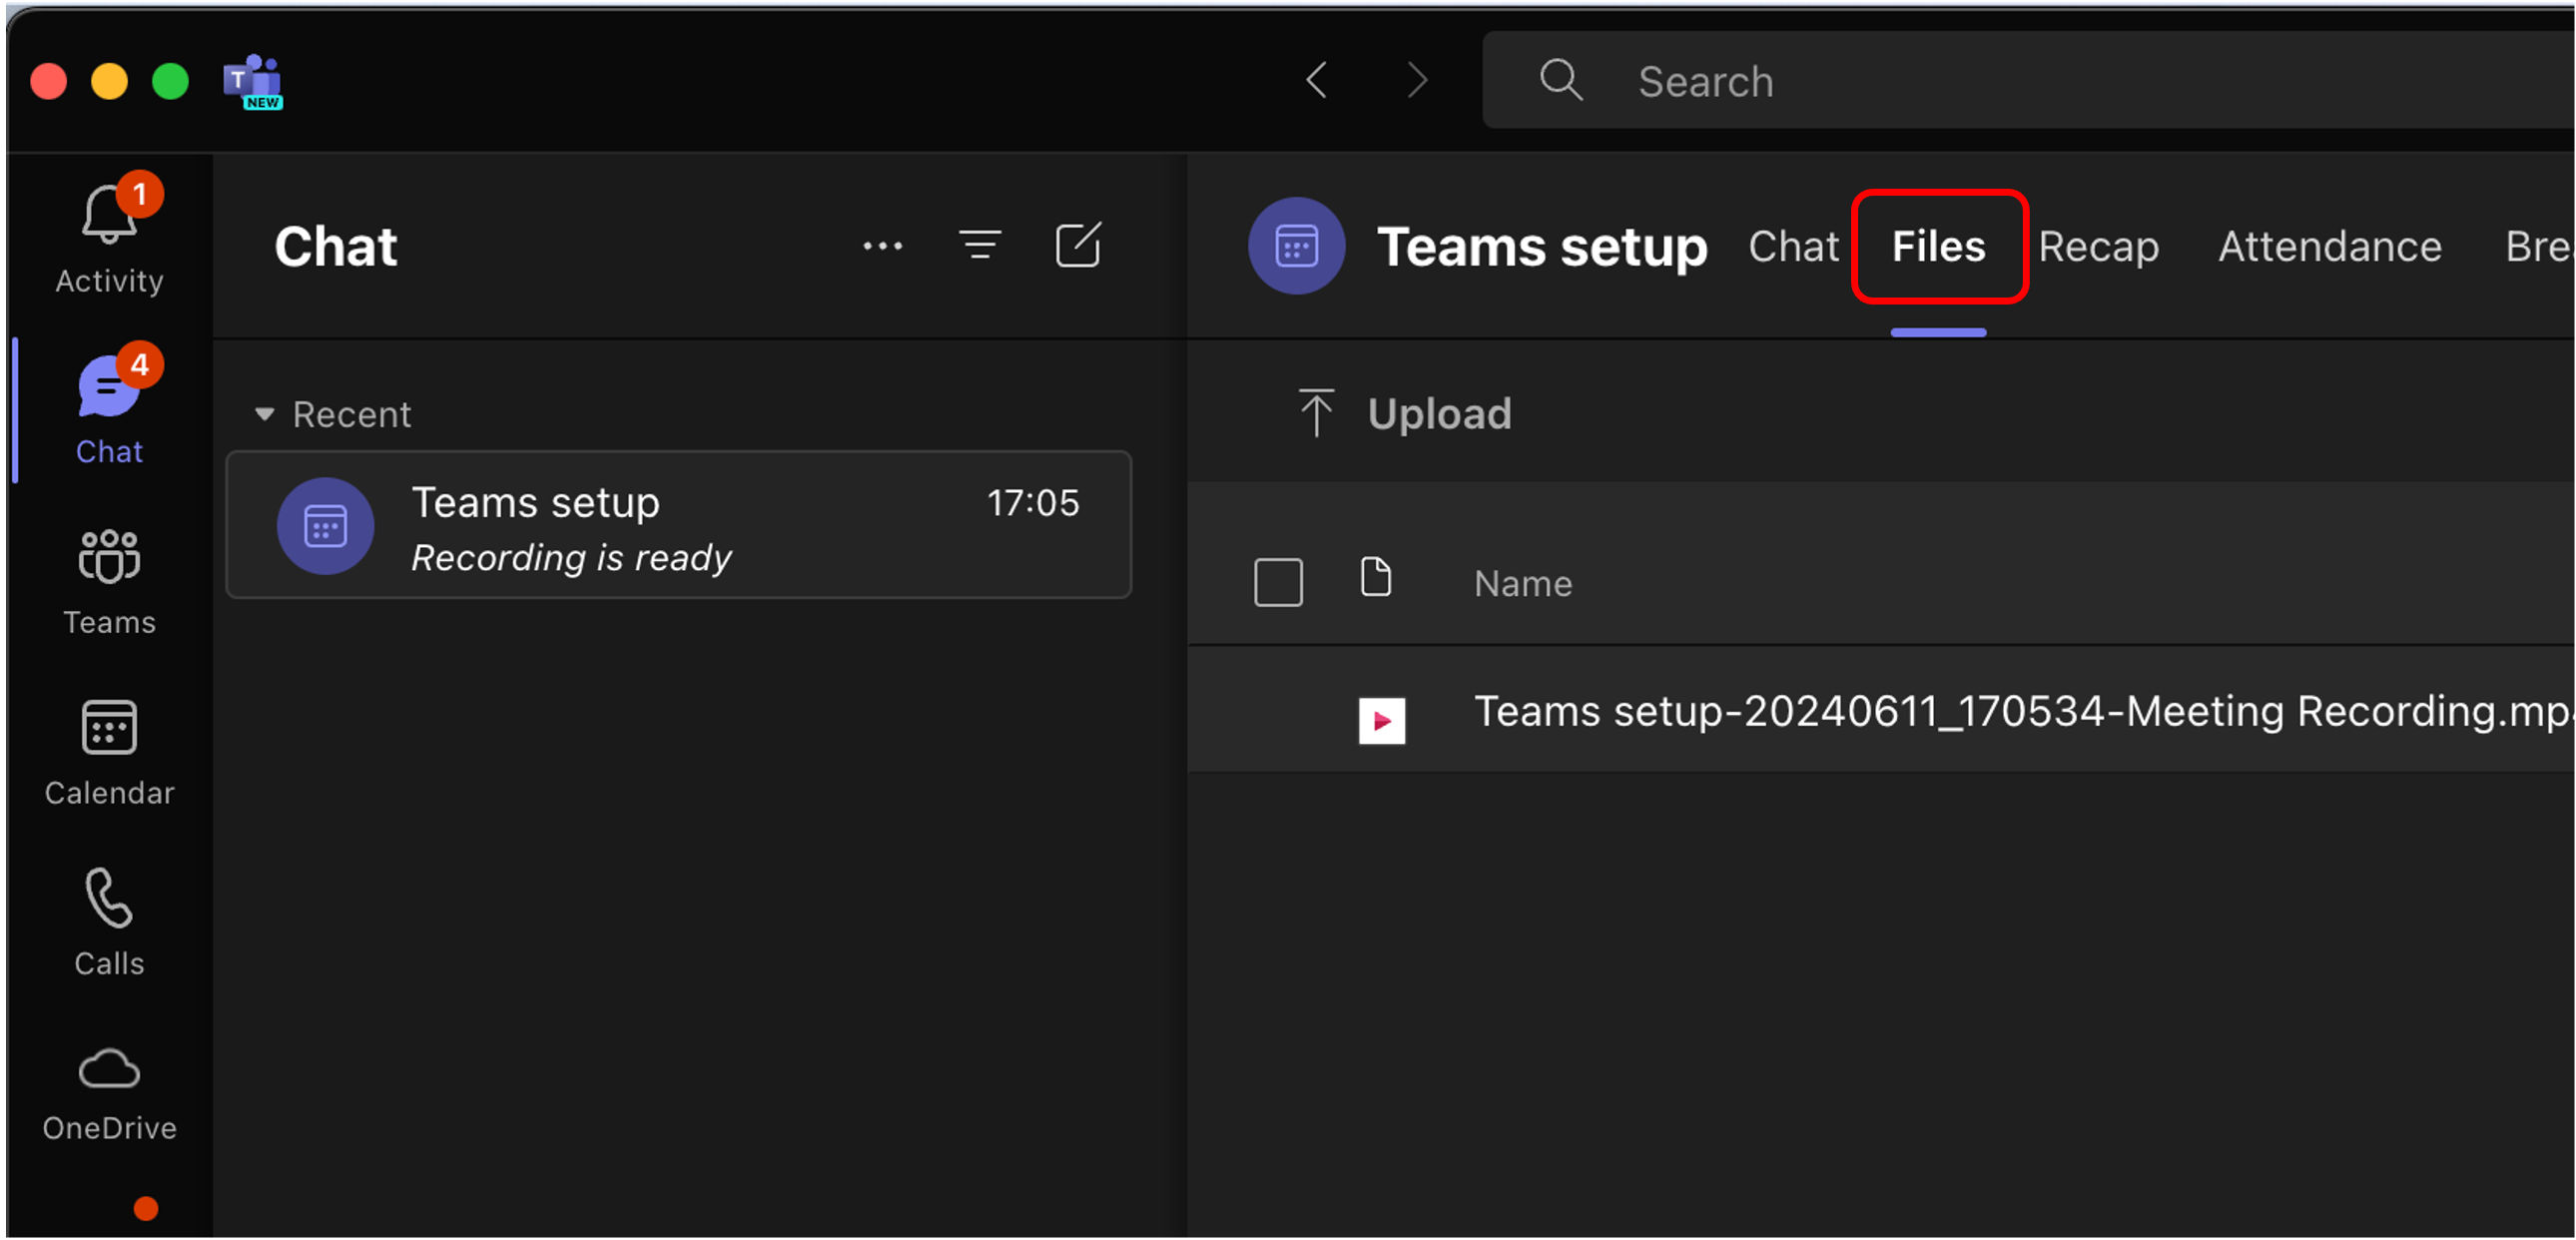
Click on 'Files' in the top menu
Click the three dots and then select ‘Download’
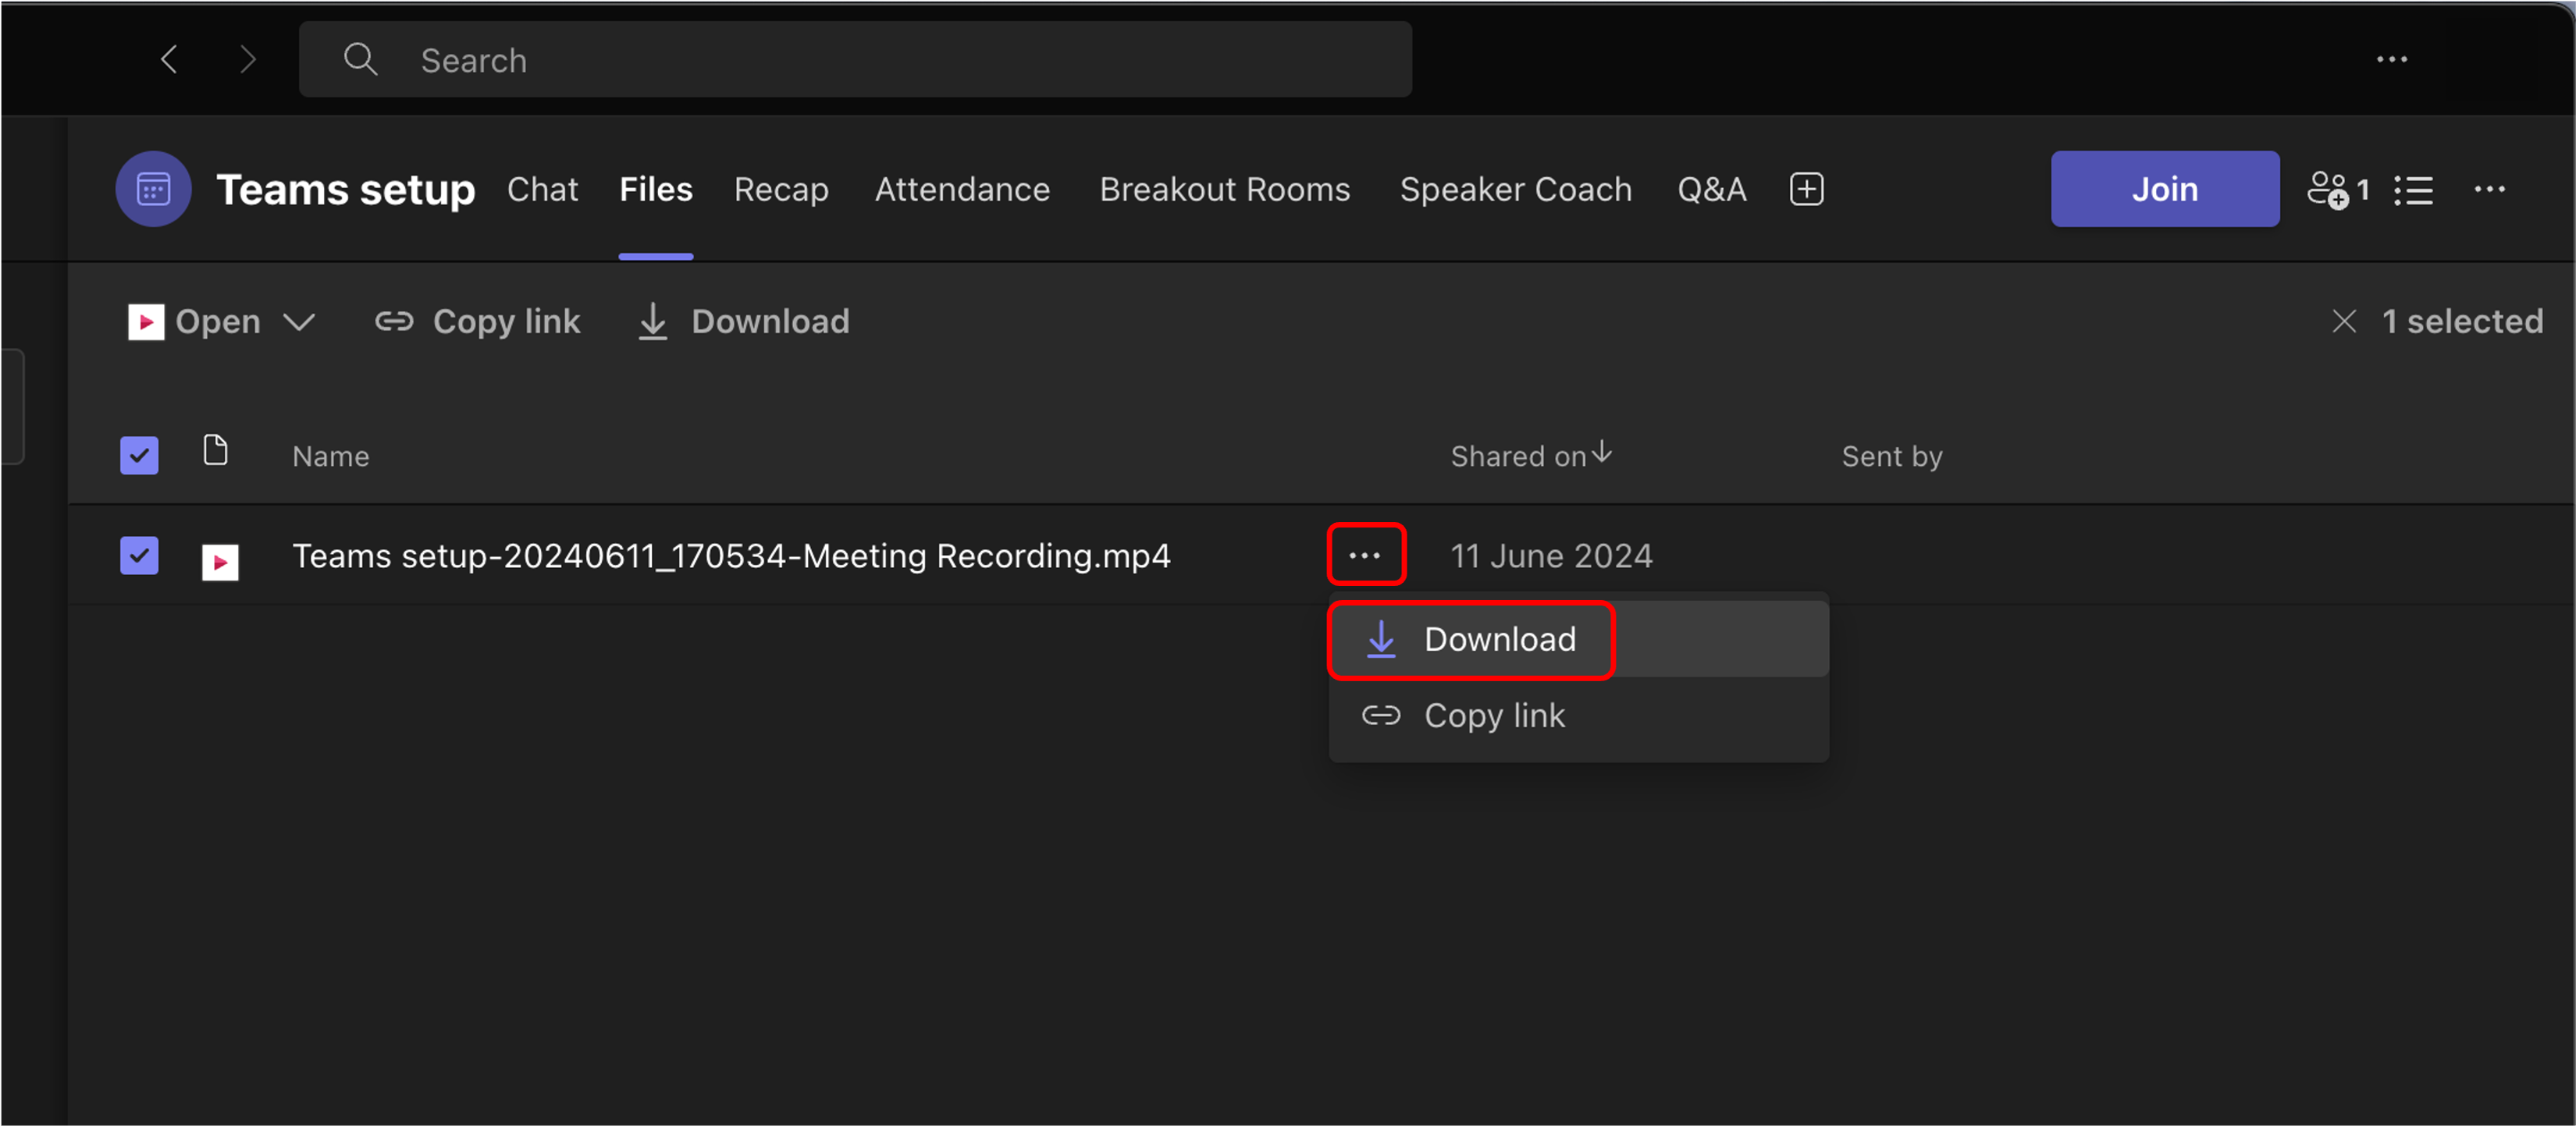
The recording will now save to your Downloads folder